Skip to content

Unlike other grade items and categories in the Grade Book, final grades are not available to students by default. Final grades must be released. When setting up the Grade Book, the instructor can choose to automatically release final grades so that the students can see their final grade throughout the semester. If you did not choose to enable the automatic release of final grades when setting up your Grade Book, you will have to manually release final grades in order for students to see their final grade.

Additionally, you can selectively release final grades for some students now and release the final grades for other students later. For example, you can release the final grades for graduating seniors on one date and release the final grades for everyone else on a later date.

Follow these steps to do it.

To manually release final grades:

  1. On the NavBar, click Grades.
  2. On the Enter Grades page, from the Final Calculated Grade or Final Adjusted Grade context menu, click Enter Grades.
  3. To release grades for all users, on the Final Grades page, from the Final Grades context menu, click Release All. To release final grades for a specific user, do one of the following:
    • Select the check box by the user name and click the Release/Unrelease link.
    • Select the check box in the Release Final Calculated Grade or Release Adjusted Final Grade column.
  4. Click Save.

OR watch this video for instructions on how to release final grades:

NOTE: There is a slight change in the video instructions. The "Enter Grades" option should be used anywhere in the video where "Grade All" is referenced.

Want more information?

Troubleshoot Final Grades (video)
Adjust Final Grades
Release Final Grades
Brightspace Tip #437: Grade Book

View current, past, and preview upcoming Continuous Delivery release notes
Instructors Quick Start Tutorial
Brightspace Known Issues
Request a sandbox course
Sign-up for Brightspace training sessions
You can find Brightspace help at D2L's website.
Join the Brightspace Community.
Try these Brightspace How-To documents.
Visit our Brightspace FAQs for additional Brightspace information
or schedule a one-on-one session, email, or
call Janice Florent: (504) 520-7418.

Note: Are you doing something innovative in Brightspace or perhaps you've discovered a handy tip? Share how you are using Brightspace in your teaching and learning in The Orange Room.

Image credit: "final grades" by jflorent is dedicated to public domain under CC0 and is a derivative of grade by OpenClipart-Vectors on Pixabay

As the semester winds down, many faculty find themselves knee-deep in grading. Entering grades into Brightspace may be a tedious time-consuming task, especially when you need to assign the same grade to multiple students. Whether it's a pass/fail assignment, a standardized in-class activity, or a participation grade, manually entering the same score repeatedly can be cumbersome and time-consuming.

In my last blog post, I explained how instructors should input grades and feedback in the Grade Book. Today, I'll share a helpful tip: using the "Set Grades" feature to quickly assign the same grade to multiple students.

Follow these steps to do it.

Give Multiple Students the Same Grade at the Same Time:

  1. From the NavBar, click on Grades.
  2. Click on the arrow on the right of the Grade Item name.
  3. Select Enter Grades.
  4. Select the checkboxes next to the names of the students OR select all of the students at once by clicking on the checkbox above the list of students.
  5. Select Set Grades.
  6. Enter a value in the Grade textbox.
  7. Select Save.
  8. Select Save and Close.

Give Multiple Students the Same Feedback at the Same Time:

  1. From the NavBar, click on Grades.
  2. Click on the arrow on the right of the Grade Item name.
  3. Select Enter Grades.
  4. Select the checkboxes next to the names of the students OR select all of the students at once by clicking on the checkbox above the list of students.
  5. Select Add Feedback.
  6. Enter feedback in the textbox.
  7. Select Save.
  8. Select Save and Close.

choose the enter grades option from the context menu

set grades and add feedback options in Enter Grades

NOTE: Giving multiple students the same feedback at the same time as described in this blog post is helpful for giving multiple students, like group members, the same feedback on an assignment/activity. I do not recommend using the Add Feedback functionality in this way if you want or need to provide more personalized details to each student. In that case, you should enter the personalized feedback for each student individually.

Want more information?

Enter Bulk Grades Using the Set Grades Feature (video)
Brightspace Tip #480: Grade Book – Enter Grades and Feedback
Brightspace Tip #382: Escaping Grading Jail

View current, past, and preview upcoming Continuous Delivery release notes
Instructors Quick Start Tutorial
Brightspace Known Issues
Request a sandbox course
Sign-up for Brightspace training sessions
You can find Brightspace help at D2L's website.
Join the Brightspace Community.
Try these Brightspace How-To documents.
Visit our Brightspace FAQs for additional Brightspace information
or schedule a one-on-one session, email, or
call Janice Florent: (504) 520-7418.

Note: Are you doing something innovative in Brightspace or perhaps you've discovered a handy tip? Share how you are using Brightspace in your teaching and learning in The Orange Room.

grade book

Assessments measure student achievement. They may take the form of traditional assessments such as exams, or quizzes, but may also be part of learning activities such as group projects, discussions, or presentations.

Brightspace has a number of tools instructors can use to assess learners and the Grades tool is useful for assigning and keeping track of learner grades. If you are not familiar with setting up your Grade Book, review Brightspace Tip #437: Grade Book for information.

There are multiple ways to enter grades for learner submissions in Brightspace. Three ways instructors can enter grades in their Brightspace courses are:

  • Using Quick Eval
  • Within Individual Tools
  • In the Grade Book

Quick Eval

Quick Eval is a tool that allows evaluators to see a list of unevaluated learner submissions from all their courses. Submissions from Assignments, Discussions, and Quizzes are displayed in one location to improve efficiency when locating work that requires evaluation and providing feedback to learners. Instructors can use Quick Eval to assess learner submissions.

Within Individual Tools

For assessments that are created using a Brightspace tool, such as Quizzes, Assignments, and Discussions, instructors will associate the assessment with a Grade Item in the Grade Book. The association is made within the tool itself. When you are ready to grade the student’s work, you will grade it within the tool and the grade will automatically transfer over to the Grade Item in the Grade Book.

In the Grade Book

For assessments that occur outside of Brightspace, instructors have to create a Grade Item in the Grade Book, and then manually enter student grades into the Grade Book. Examples of in-class assessments where you may need to manually enter grades in the Grade Book include participation grades, tests administered on-paper, presentations, and demonstrations.

Instructors can manually enter grades for assessments in the Grade Book’s Standard View or Spreadsheet View.

Standard View

The Standard View allows instructors to enter grades by grade item for all students in the course or for an individual student.

switch to standard view button in Grades tool

The standard view allows instructors to evaluate individual learner submissions. Each submission type has a unique icon and new learner submissions are identified with a dot on the corner of the icon.

Learner submission icons with a new submission indicator dot on the discussion icon

Click the associated icon next to the learner submission to evaluate the submission.

Spreadsheet View

The Spreadsheet View allows instructors to enter grades for all students and all grade items in a single spreadsheet view. For quick edits, click “Switch to Spreadsheet View” (the button toggles back and forth between “Standard View” and “Spreadsheet View.”)

switch to spreadsheet view button in Grades tool

The Spreadsheet View allows instructors to manually enter or modify grades in cells. Instructors can also override previously-entered grades using the Spreadsheet View.

Entering the new or updated grade in the field for the learner and the submission

Spreadsheet View is ideal for entering grades for assessments that occurred outside of Brightspace. Once you’ve entered the grades, save the changes before leaving the page.

Entering Feedback

You can enter feedback by clicking on the arrow to the right of the grade item (column) you want to add feedback to, then select Enter Grades.

choose the enter grades option from the context menu

Locate the name of the student you want to provide feedback for, then select the pencil icon under the Feedback column and enter the feedback.

feedback's pencil icon identified
The pencil icon opens the feedback dialog box

Once you’ve entered the grades and feedback, save the changes before leaving the page.

NOTE: When entering feedback you have the option to enter private comments that will only be visible to you and users with grading privileges. Learners cannot see private comments.

Important

  • Remember tool-based assessments should be graded using the respective assessment tool.
  • Use the Enter Grades tab to easily view all learner grades, grade categories and grade items. From the Enter Grades tab, instructors can assess and evaluate grades for activities conducted outside of Brightspace.

Want more information?

Brightspace Tip #437: Grade Book
Brightspace Tip #475: Quick Eval
Enter Grades in the Grades tool
Grading in Brightspace
Brightspace Tip #204: Interactive Rubrics

View current, past, and preview upcoming Continuous Delivery release notes
Instructors Quick Start Tutorial
Brightspace Known Issues
Request a sandbox course
Sign-up for Brightspace training sessions
You can find Brightspace help at D2L's website.
Join the Brightspace Community.
Try these Brightspace How-To documents.
Visit our Brightspace FAQs for additional Brightspace information
or schedule a one-on-one session, email, or
call Janice Florent: (504) 520-7418.

Note: Are you doing something innovative in Brightspace or perhaps you've discovered a handy tip? Share how you are using Brightspace in your teaching and learning in The Orange Room.

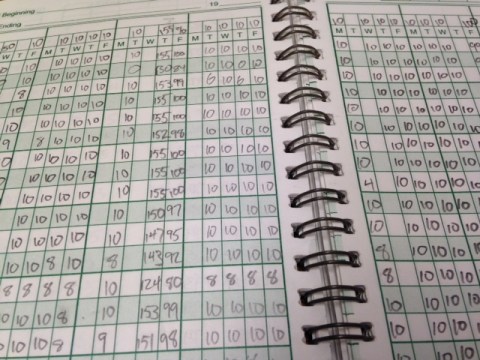
Image credit: Grade book by David Mulder | CC BY-SA 2.0 (image cropped)

up close view of keyboard keys

When you met with a student, have you ever wanted to go over their grades with them but you were unable to do so because the Grade Book displays all of the other students' grades? This isn't a problem in Brightspace. You can use the Grade Book search to temporarily hide the grades of all the other students and only show the grades for a single student.

Follow these steps to do it.

To display one row in the Grade Book:

  1. On the NavBar, click Grades.
  2. On the Enter Grades page, enter the first and last name of the desired student in the Search For field and then click on search icon.
  3. When done, you should only see the selected student.

Note: If you have more than one student with the same name, you can enter the 900 # of the desired student in the Search For field. Ultimately, your search results should yield the row with the desired student's record.

Manage Grades tab with Search For field identified

To display all rows in the Grade Book:

  1. On the Enter Grades page, click on the Clear Search link.

Manage Grades tab with Clear Search link identified

Want more information?

Brightspace Tip #437: Grade Book
Understanding the Grades Tool

View current, past, and preview upcoming Continuous Delivery release notes
Instructors Quick Start Tutorial
Brightspace Known Issues
Request a sandbox course
Sign-up for Brightspace training sessions
You can find Brightspace help at D2L's website.
Join the Brightspace Community.
Try these Brightspace How-To documents.
Visit our Brightspace FAQs for additional Brightspace information
or schedule a one-on-one session, email, or
call Janice Florent: (504) 520-7418.

Note: Are you doing something innovative in Brightspace or perhaps you've discovered a handy tip? Share how you are using Brightspace in your teaching and learning in The Orange Room.

Image credit: "Image" by Wilbert Maximus from Pixabay

ICYMI, an Automatic Zero Grading for Missing Submissions feature was introduced with our July Continuous Delivery updates. The automatic zero grading feature automatically assigns a score of zero (0) to unsubmitted learner activities once the due date passes. This automation eliminates the need for instructors to manually assign zeros to missing submissions, simplifying the process of identifying learners who have not submitted their course work. Additionally, learners benefit by receiving a more accurate view of their grade calculations for individual activities and the overall course.

Automatic zero grading is an optional feature that must be enabled by the instructor. It is enabled on a course-by-course basis. You will see the option to enable Automatic Zero for Missing Submissions in the Setup Wizard and in Grade Book settings.

Automatic Zero for Missing Submissions checkbox
For instructors, the Automatic Zero for Missing Submissions check box appears in the Grade Calculations area of Grade Settings when the Automatic Zero function is turned on.

The Automatic Zero for Missing Submissions grading option comprises two main features:

  • Automatically assigning a grade of zero for unreceived submissions past due date: This feature ensures that any assignment not submitted by the due date is automatically given a zero.
  • Automatically tagging the assigned zero grade: This indicator shows the grade was automatically assigned, not manually graded by the instructor.

You can differentiate between system-added zero grades and manually entered zero grades in the Grade Book.

On the Enter Grades tab in the Grade Book, instructors see a dashed underline applied to automatic zeros (0) along with a tooltip, that appears when you hover over it, to indicate that the system automatically applied the zero (0).

zero grade is underlined and automatic zero tooltip showing missing submission on due date message
Dashed underline applied to automatic zeros(0) along with a tooltip indicating the system automatically applied the zero (0) grade.

On the View Grades page, learners see a zero (0) grade appear, along with a default text message stating: This activity is overdue, and you haven’t completed it. Complete it now to update your grade. This default text is dynamic: learners can only see the message until the end date for the activity, at which time the feedback disappears. Instructors cannot edit this dynamic message text. Instructors must manually enter their own feedback comments if they want the learner feedback to persist.

NOTE: The default text is not grade feedback. The message text disappears when the grade item is regraded, hidden, or past the end date. Additionally, the default text does not appear in grades notifications, data sets, or user progress. Therefore, instructors must manually enter a comment if they want to provide feedback on the zero grade.

learner's view of grades when automatic zero is applied
Learners see a zero (0) grade along with the default text message stating: This activity is overdue, and you haven’t completed it. Complete it now to update your grade.

Timing and Availability for Automatic Zero Grading

Timing

  • The Automatic Zero feature is most effective when implemented at the start of a course. Once automatic zero grading is turned on, only activities with due dates in the future will be able to trigger automatic zero grading.
  • Automatic zero will not affect grades retroactively. Manually grading missed submissions is still required in this situation.
  • There is no retroactive automatic zero grading applied for new users enrolled after the due date has passed for activities. Courses with frequent additions of new users should consider this limitation.
  • This feature is based on local time zones for both instructors and learners. It follows the same rules as existing due dates.
  • Automatic zero grading is triggered within minutes of a due date passing. Note that it may take up to 15 minutes for zero grades to appear in the Grade Book.

Availability

  • Automatic zero grading only applies to course activities with grade associations and a future due date. Editing an activity to change its past due date to a future due date also applies the automatic zero grading feature.
  • Automatic zero grading only applies to visible and available activities. If an assessment has Release Conditions and due date, a learner will only receive an Automatic Zero if they meet the release conditions when the due date passes.
  • Automatic zero grading is course-wide setting. It cannot be selectively enabled or disabled at the activity or grade item level.
  • Automatic zero grading applies to individual and group assignments.
  • Automatic zero grades apply to special access due dates. In the event special access is added after the original due date, the original 0 grade remains in place until the activity is evaluated manually.
  • Learners can submit a course activity after the due date after they have received an automatic zero (if the activity remains available). Instructors can manually grade and override the zero. In this case, the corresponding overdue indicators will be cleared in the gradebook and learner view of grades.
  • Automatic zero functionality publishes grade items with zero to learners automatically in the Grades view.
  • Like other grade settings, automatic zero setting is respected and copied over when copying a course. Note the setting does not persist when importing or exporting a course or grades.

Want more information?

About automatic zero grading for missing submissions
How course activity types interact with automatic zero grading

View current, past, and preview upcoming Continuous Delivery release notes
Instructors Quick Start Tutorial
Brightspace Known Issues
Request a sandbox course
Sign-up for Brightspace training sessions
You can find Brightspace help at D2L's website.
Join the Brightspace Community.
Try these Brightspace How-To documents.
Visit our Brightspace FAQs for additional Brightspace information
or schedule a one-on-one session, email, or
call Janice Florent: (504) 520-7418.

Note: Are you doing something innovative in Brightspace or perhaps you've discovered a handy tip? Share how you are using Brightspace in your teaching and learning in The Orange Room.

Brightspace calculates final grades for each student based on the grading system and the students' grades that are entered into the Grade Book. If the instructor wants more control over the final grades, perhaps to adjust the final grade for a student that is on the cusp of a higher grade, then adjusted final grades can be used and released to students instead of the calculated final grade.

wrench

If the instructor decides to use adjusted final grades for one student in the course, adjusted final grades must be used for all students in the course. This does not imply, however, that final grades must be manually adjusted for all students.

Adjusting final grades are implemented by the instructor for only the student or students that are deemed to need an adjusted grade. The remaining students final grades would be the final grade as calculated in the Grade Book.

Note: The Grade Book must be configured to use adjusted final grades. If you plan to use adjusted final grades, you should make the adjustments before you release final grades.

Follow these steps to do it.

To adjust final grades for all students:

  1. Get into the course where you want to adjust final grades and click Grades in the NavBar.
  2. Click on the Enter Grades link.
  3. Scroll over to the Final Calculated Grade column and click on the arrow on the right of the column name and select Enter Grades.
  4. In the Final Adjusted Grade section for each student, enter the adjusted grades and then click Save.
  5. Once you have ensured that students' grades are accurate, you can release the final grades.

To adjust final grades for one or more specific students:

  1. Get into the course where you want to adjust final grades and click Grades in the NavBar.
  2. Click on the Enter Grades link.
  3. Scroll over to the Final Calculated Grade column and click on the arrow on the right of the column name and select Enter Grades.
  4. Click on the arrow on the right of the Final Grades and click Transfer All, then click Yes.
  5. In the Final Adjusted Grade section, enter adjusted scores where necessary and click Save.
  6. Once you have ensured that students' grades are accurate, you can release the final grades.

Want more information?

Understanding the Grades Tool (video)
Troubleshoot Final Grades (video)
Adjusted Final Grades
Release Final Grades
Brightspace Tip #437: Grade Book

View current, past, and preview upcoming Continuous Delivery release notes
Instructors Quick Start Tutorial
Brightspace Known Issues
Request a sandbox course
Sign-up for Brightspace training sessions
You can find Brightspace help at D2L's website.
Join the Brightspace Community.
Try these Brightspace How-To documents.
Visit our Brightspace FAQs for additional Brightspace information
or schedule a one-on-one session, email, or
call Janice Florent: (504) 520-7418.

Note: Are you doing something innovative in Brightspace or perhaps you've discovered a handy tip? Share how you are using Brightspace in your teaching and learning in The Orange Room.

Image credit: Image by webandi from Pixabay

Unlike other grade items and categories in the Grade Book, final grades are not available to students by default. Final grades must be released. When setting up the Grade Book, the instructor can choose to automatically release final grades so that the students can see their final grade throughout the semester. If you did not choose to enable the automatic release of final grades when setting up your Grade Book, you will have to manually release final grades in order for students to see their final grade.

Additionally, you can selectively release final grades for some students now and release the final grades for other students later. For example, you can release the final grades for graduating seniors on one date and release the final grades for everyone else on a later date.

Follow these steps to do it.

To manually release final grades:

  1. On the NavBar, click Grades.
  2. On the Enter Grades page, from the Final Calculated Grade or Final Adjusted Grade context menu, click Enter Grades.
  3. To release grades for all users, on the Final Grades page, from the Final Grades context menu, click Release All. To release final grades for a specific user, do one of the following:
    • Select the check box by the user name and click the Release/Unrelease link.
    • Select the check box in the Release Final Calculated Grade or Release Adjusted Final Grade column.
  4. Click Save.

OR watch this video for instructions on how to release final grades:

NOTE: There is a slight change in the video instructions. The "Enter Grades" option should be used anywhere in the video where "Grade All" is referenced.

Want more information?

Troubleshoot Final Grades (video)
Adjust Final Grades
Release Final Grades
Brightspace Tip #437: Grade Book

View current, past, and preview upcoming Continuous Delivery release notes
Instructors Quick Start Tutorial
Brightspace Known Issues
Request a sandbox course
Sign-up for Brightspace training sessions
You can find Brightspace help at D2L's website.
Join the Brightspace Community.
Try these Brightspace How-To documents.
Visit our Brightspace FAQs for additional Brightspace information
or schedule a one-on-one session, email, or
call Janice Florent: (504) 520-7418.

Note: Are you doing something innovative in Brightspace or perhaps you've discovered a handy tip? Share how you are using Brightspace in your teaching and learning in The Orange Room.

Image credit: "final grades" by jflorent is dedicated to public domain under CC0 and is a derivative of grade by OpenClipart-Vectors on Pixabay

extra bonus icon

I am writing this blog post as a follow up to my Brightspace Tip #440: Grade Book - Bonus Points blog post. I've received a few questions about bonus items in a weighted grading system. This blog post addresses how bonus items work in a weighted Grade Book.

Bonus refers to optional activities. Students are NOT penalized for skipping the activity. Points earned for Bonus activities will improve the student’s grade. Checking the Bonus option means that any points earned will be added onto the Final Calculated Grade. Bonus items appear in the Grade Book with a Star next to them.

Bonus grade items are not included in the maximum points for a category or final grade. They are added on top of the calculated grade. The Can Exceed option must be selected in order for users' grades to exceed the maximum points specified.

The Can Exceed and Bonus options can both be selected for a grade item.

bonus grade item

If you allow an item to exceed 100% or include Bonus items, but do not check the box "Can Exceed" in the category and/or “Final Calculated Grade” settings, then extra credit will count but it will be limited to no more than 100% for the category or “Final Calculated Grade.”

If you create a “Bonus” item with no category, limit its weight to the most you wish to add to the final course percentage. For example, if you do not want to add more than 3% to any given final grade, limit the Bonus item’s weight to 3%. The bonus points can be any number of points because the weight makes the difference in the overall calculation.

thought bubble with light blub

Refer to this Demystifying Bonus Items in a Weighted Grade Book document for example of weighted grading system with bonus item and an explanation of the final grade calculation.

Want more information?

Demystifying Bonus Items in a Weighted Grade Book
Brightspace Tip #440: Grade Book - Bonus Points
About Bonus Grade Items
Extra Credit
Create a Grade Item (video)
Brightspace Tip #437: Grade Book

View current, past, and preview upcoming Continuous Delivery release notes
Instructors Quick Start Tutorial
Brightspace Known Issues
Request a sandbox course
Sign-up for Brightspace training sessions
You can find Brightspace help at D2L's website.
Join the Brightspace Community.
Try these Brightspace How-To documents.
Visit our Brightspace FAQs for additional Brightspace information
or schedule a one-on-one session, email, or
call Janice Florent: (504) 520-7418.

Note: Are you doing something innovative in Brightspace or perhaps you've discovered a handy tip? Share how you are using Brightspace in your teaching and learning in The Orange Room.

Image credits: extra png from pngtree.com and image by OpenClipart-Vectors from Pixabay

bonus icon

There are two ways to give extra credit in Brightspace. The first is to allow the grade item to exceed the maximum number of points for the assignment. The other option is to indicate the grade item is a “Bonus” item.

The differences between the two options are explained here:

  • Can Exceed means in grading an item you are able to add extra credit to the assignment, quiz, or any item in the Grade Book. You indicate this by checking the Can Exceed box.
    • The Can Exceed option can boost student’s score on activity making it feasible to earn more than 100%. For example, on a grade item where the maximum points is 10 and the Can Exceed option is selected, a grade of 12/10 is a perfect score with 2 extra credit points added.
    • When you choose Can Exceed for a grade item in the Grade Book, you should also select Can Exceed for the Category in which the grade item resides.
  • Bonus refers to optional activities. Students are NOT penalized for skipping the activity. Points earned for Bonus activities will improve the student’s grade. Checking the Bonus option means that any points earned will be added onto the Final Calculated Grade.
    • Bonus items appear in the Grade Book with a Star next to them.
    • Bonus grade items are not included in the maximum points for a category or final grade. They are added on top of the calculated grade. Bonus grade items cannot make users' grades exceed the maximum points specified, unless the Can Exceed option is selected.

The Can Exceed and Bonus options can both be selected for a grade item.

bonus grade item

NOTE: When you place bonus items in a category in your Grade Book, you should make sure to edit the category and select "Can Exceed" for the category because you want the category to exceed 100%. This way the student’s bonus points will count toward their final grade, and not just the category.

Want more information?

About Bonus Grade Items
Extra Credit
Create a Grade Item (video)
Brightspace Tip #437: Grade Book

View current, past, and preview upcoming Continuous Delivery release notes
Instructors Quick Start Tutorial
Brightspace Known Issues
Request a sandbox course
Sign-up for Brightspace training sessions
You can find Brightspace help at D2L's website.
Join the Brightspace Community.
Try these Brightspace How-To documents.
Visit our Brightspace FAQs for additional Brightspace information
or schedule a one-on-one session, email, or
call Janice Florent: (504) 520-7418.

Note: Are you doing something innovative in Brightspace or perhaps you've discovered a handy tip? Share how you are using Brightspace in your teaching and learning in The Orange Room.

Image credit: bonus png from pngtree.com

grade book page

The Brightspace Grades Tool is useful for providing students with up-to-date information about their current standing in the course. For instructors, it’s useful for assigning and keeping track of student grades. Students can view grade entries and monitor their progress throughout the course.

As an instructor, you can determine how to set up your Grade Book to best reflect your approach to evaluation, including the grading system and grade scheme that is most appropriate for your course. You can select how grades display to learners, how they update in the Grade Book, and how you want to deal with ungraded items. You can create grade items for projects, assignments, discussions, quizzes, etc. to include in your Grade Book, and even associate them with other tools (e.g. Assignments, Quizzes, Discussions).

Follow these steps to do it.

Listed below are links to how-to documents to help you to use the Grades Tool:

Want more information?

View current, past, and preview upcoming Continuous Delivery release notes
Instructors Quick Start Tutorial
Brightspace Known Issues
Request a sandbox course
Sign-up for Brightspace training sessions
You can find Brightspace help at D2L's website.
Join the Brightspace Community.
Try these Brightspace How-To documents.
Visit our Brightspace FAQs for additional Brightspace information
or schedule a one-on-one session, email, or
call Janice Florent: (504) 520-7418.

Note: Are you doing something innovative in Brightspace or perhaps you've discovered a handy tip? Share how you are using Brightspace in your teaching and learning in The Orange Room.

Photo Credit: Grade book by David Mulder | CC BY-SA 2.0