Skip to content

Updates to the Assignment tool give instructors greater control over the behavior of availability dates for their learners. As a result, instructors can:

  • Stop late submissions.
  • Let learners view assignment information and submissions after it ends.
  • Schedule the visibility of an assignment.
  • Allow learners to view an assignment while preventing them from attempting it.
  • Post the start and end of an assignment to the Calendar.

The Assignment list page for both instructors and learners contain all activity dates and date settings, including:

  • Access restricted
  • Submission restricted
  • Hidden
The Availability Date Defaults page, the Assignment page with activity dates and date settings.
The Availability Date Defaults page, the Assignment page with activity dates and date settings

The availability date settings let instructors setup assignments to achieve a few different workflows for students:

  • To stop late submissions, set an end date that is submission-restricted. Learners will be able to see the assignment information after the end date, but will not be able to submit.
  • To let learners access their submissions after the assignment has ended, set an end date that is submission-restricted.
  • To prevent learners from attempting an assignment but still allow them to view details like instructions and attachments, set a start date that is submission-restricted.
  • To schedule the visibility of an assignment you want students to see at a specific time, set a start date that is hidden to completely hide it from students; or set a start date that is access-restricted to let students see the name and dates of the assignment but no other details.
  • To show the start and end of an assignment in the Calendar, include start and end availability dates on the assignment and select Add availability dates to Calendar.

Instructors can choose the default settings for availability dates for any new assignment. The settings are available on the Availability Date Defaults page, which can be found under Course Admin.

The Availability Dates Defaults page displaying the different options for Start and End Dates in Assignments and Discussions.

Important: Making a change on the Availability Date Defaults page will not affect the availability dates of any previously-created assignment or discussion, but it will affect the date properties of special access dates.

Properties of Availability Dates for Assignments

The availability dates for Assignments properties are described below. These properties align and behave the same way as the same properties available to Discussions topics and forums.

The Availability Start and End Dates each have a set of three options. Instructors can select one option for each date. By choosing an option, instructors decide whether learners can see the assignment and access it. The options are:

  1. Visible with access-restricted (before start/after end)
    • The assignment will be visible to learners before the Start Date or after the End Date, but they cannot click or open it.
    • With this setting, learners can see the name, dates, and restrictions. Learners cannot see the assignment description or attachments.
  2. Visible with submission-restricted (before start/after end)
    • The assignment will be visible to learners before the Start Date or after the End Date and they can click or open it, but they cannot submit or mark it as complete.
    • With this setting, learners can see all details about the assignment including description, attachments, and rubrics, but they cannot upload files, enter comments, or mark the assignment as complete (for observed in person/on paper submission).
  3. Hidden (before start/after end)
    • The assignment is hidden to learners until the start date is reached or after the end date passes.
    • Learners will not see the assignment anywhere across Brightspace, including corresponding Calendar events and Notifications.

The Assignment List page contains all activity dates and date settings. The hover tooltip includes the information about start and end dates with settings to explain how the assignment appears to learners before and after these dates.

The Assignment page with activity dates and date settings.
The Assignment List page with activity dates and date settings.

Assignment Special Access

The special access for Assignments screens remains unchanged. However, special access dates inherit the date properties as follows:

  • When the parent assignment has an availability date set, its date property is inherited by the corresponding special access date. For example, if the assignment is hidden before a start date, then the special access start date is also treated as hidden.
  • When the parent assignment does not have an availability date, the special access date inherits its date property from the course default. For example, if the assignment does not have an end date, then a special access end date is set for a learner. This also occurs if the course default for assignment end dates is submission-restricted, making the special access end date be treated as submission-restricted.

Note: Whenever the availability date settings are changed from the Availability Date Defaults page, those changes will immediately impact the date properties of special access dates.

Want More Information?

View current, past, and preview upcoming Continuous Delivery release notes
Instructors Quick Start Tutorial
Brightspace Known Issues
Request a sandbox course
Sign-up for Brightspace training sessions
You can find Brightspace help at D2L's website.
Join the Brightspace Community.
Try these Brightspace How-To documents.
Visit our Brightspace FAQs for additional Brightspace information
or schedule a one-on-one session, email, or
call Janice Florent: (504) 520-7418.

Note: Are you doing something innovative in Brightspace or perhaps you've discovered a handy tip? Share how you are using Brightspace in your teaching and learning in The Orange Room.

Use the Assignments tool to help you set and manage deadlines, unclutter your inbox, and save trees!

email inbox showing there are 6763 unread messages

The Assignments tool is an efficient way to manage and collect your student's individual and group assignments digitally. Brightspace's Assignments Tool allows instructors to create a secure location for students to submit class assignments.

The Assignments tool allows instructors to set up a place for students to submit their assignments digitally, with the ability to:

  • Control the window for submission
  • Facilitate individual submissions or group submissions (provided the groups have been set up using the Groups tool first)
  • Collect and assess submissions (with a connection to the Grades tool, if needed)
  • Enable plagiarism detection through Turnitin

Additionally, you can use Brightspace's Interactive Rubrics to increase efficiency. The interactive rubrics allow instructors to establish set criteria for grading assignments. Instructors can attach rubrics to assignment submission folders so that the criteria are visible to students at any time, only after grading has been completed, or not shown to the students at all. The rubrics click-and-score simplicity saves time when grading because rubrics are built into the grading workflow. For more information about rubrics refer to Brightspace Tip #204: Interactive Rubrics.

Follow these steps to do it.

To create an assignment submission folder:

  1. On the NavBar (of the course you want to create a submission folder), click Activities and then choose Assignments from the drop-down menu.
  2. Click New Assignment.
  3. Enter an Assignment Title.
  4. To evaluate the assignment with a numeric value, enter a Grade Out Of. A grade item with the same name as your assignment is automatically added to your gradebook. Alternatively, you can click on the "In Grade Book" menu item to reveal a drop-down list. Select the "Edit or Link to Existing" option and then navigate to a grade item that is already in your Grade Book.
  5. Set a Due Date.
  6. Enter assignment Instructions.
  7. Upload any files, link to any existing activities or external weblinks, attach any files from Google Drive or OneDrive, and record and/or upload any audio or video notes.
  8. Expand Availability Dates & Conditions and do the following:
    • Set a Start Date and an End Date.
    • Select an availability option:
      • Visible with access restricted: The assignment appears before or after the date but cannot be opened.
      • Visible with submission restricted: The assignment appears and can be opened, but submissions are not allowed.
      • Hidden: The assignment does not appear until the start date.
    • Select Add availability dates to Calendar if desired.
    • Attach Release Conditions.
    • Use Manage Special Access to enable the assignment to be available only to a select group of users or to add individualized due dates for certain users.
  9. Expand Submission & Completion and do the following:
    • For the Assignment Type, specify if this is an Individual Assignment or Group Assignment.
    • Select an existing category to align your assignment to or click New category to create a category.
    • Select a Submission Type:
      • For File submissions, set the number of Files Allowed Per Submission and the Submissions rules.
      • For File or text submission, set the number of Files Allowed Per Submission and the Submissions rules.
      • For Text submissions, set the Submission rules.
      • For On paper submissions, set Marked as completed to one of the available options: Manually by learners, Automatically on evaluation, or Automatically on due date.
      • For Observed in person assignments, set Marked as completed to one of the available options: Manually by learners, Automatically on evaluation, or Automatically on due date.
    • From the Allowable File Extensions dropdown menu, select an option to restrict file extensions on submissions for the assignment.
    • Use Notification Email to receive email notifications when an assignment is submitted.
  10. Expand Evaluation & Feedback and do the following:
    • Click Add rubric and either create and attach a new rubric or add an existing one.
    • Under Annotation Tools, select the Make annotation tools available for assessment check box.
    • To enable anonymous marking, under Anonymous Marking, select the Hide student names during assessment check box.
    • Under Evaluators, click Select Evaluators to select evaluators who can evaluate and leave feedback on assignment submissions.
    • Under Turnitin Integration, click Manage Turnitin to enable the Turnitin integration and click Save.
  11. To make your assignment visible to learners, click on the Visibility toggle.
  12. Click Save and Close.

Want More Information?

Assignments:

Turnitin:

Rubrics:

View current, past, and preview upcoming Continuous Delivery release notes
Instructors Quick Start Tutorial
Brightspace Known Issues
Request a sandbox course
Sign-up for Brightspace training sessions
You can find Brightspace help at D2L's website.
Join the Brightspace Community.
Try these Brightspace How-To documents.
Visit our Brightspace FAQs for additional Brightspace information
or schedule a one-on-one session, email, or
call Janice Florent: (504) 520-7418.

Note: Are you doing something innovative in Brightspace or perhaps you've discovered a handy tip? Share how you are using Brightspace in your teaching and learning in The Orange Room.

Image credit: image by gabrielle_cc from Pixabay

A cluster of metallic gears interlocked on a shiny surface, showcasing intricate mechanical design and engineering.

Online groups can enrich class discussion and provide a virtual environment for sharing information. You can use groups to organize users’ work on projects and assignments, or you can create special work areas for users with different learning needs. The Groups tool allows instructors to form virtual groups of students to support peer collaboration.

Users can belong to multiple groups within the same course. For example, each user can simultaneously belong to a group for class projects, a group for special interest discussions, and a group for advanced users. Each group can have its own discussion forums, assignments, and locker area to work in. You can grade members of groups individually or as a team.

Groups can be designated as Self Enrollment (allows students to add themselves to a Group), No Auto Enrollment (instructor assigns students to Groups), or random enrollment (Brightspace system distributes students equally into Groups).

Group Enrollment Type Description
# of Groups

Groups of #

Groups will be created by either number of groups (i.e., 4 groups total) or group size (i.e., groups of 4 students). Students will be randomly assigned to each group.
# of Groups - No Auto Enrollment This option allows instructors to manually assign students to groups.
# of Groups - Self Enrollment

Groups of # - Self Enrollment

# of Groups, Capacity of # – Self Enrollment

Blank groups will be created for students to sign-up for. Students will be able to see the other members of their group.
Single user, member-specific groups This option creates groups of one (1). Each group has a single user where the first name and last name of the learner is the name of the group.

To support growing class sizes, the Groups tool now allows enrollment of up to 3000 users per group within a group category. Previously, the limit was 200 users per group.

Important: Currently, there is no way to hide the names of group members from other students who are in the same group. Therefore, creating groups for remedial or disability purposes could violate confidentiality laws if group names and/or group members makes the purpose of the group obvious.

Follow these steps to do it.

To create a group category you should:

  1. On the navbar, click Groups.
  2. On the Manage Groups page, click New Category.
  3. Enter a Category Name and Description.
  4. Select an Enrollment Type from the drop-down list.
  5. Depending on the chosen Enrollment Type, enter the Number of Groups to create, the Number of Users per group, or both.
  6. To apply a distinctive prefix to each group name and code in the category, enter it in the Group Prefix field. If you do not fill in this field, the prefix defaults to "Group".
  7. Depending on the chosen Enrollment Type, to automatically enroll users to groups, select Auto-enroll new users.
  8. Depending on the chosen Enrollment Type, to randomly place users in groups, select Randomize users in groups. If you do not choose this option, users are placed alphabetically based on the Classlist.
  9. If you select an Enrollment Type that supports self enrollment, to set a deadline after which learners can no longer self enroll in the group, select Set Self Enrollment Expiry Date.
  10. Click Save.

To create a group you should:

Note: Groups reside in categories. You must create a category before you can create a group. These instructions assume you have already created a category for the group.

  1. On the navbar, click Groups.
  2. On the Manage Groups page, from the View Categories drop-down list, select the category you want to add a group to.
  3. From the context menu of the category, click Add Group.
  4. If you do not want to use the default name provided, enter a group name.
  5. If you do not want to use the default group code provided, enter a group code.
  6. Enter a description for the group.
  7. Click Save.

Want more information?

Groups Tool Quick Reference Guide (pdf)
Creating Groups in Brightspace
Create and Manage Categories and Groups
Group Enrollment Types
Create a Group (video)
Understand Group Enrollment Options (video)
Modify Group Enrollment (video)
Best Practices for Setting Up Groups

View current, past, and preview upcoming Continuous Delivery release notes
Instructors Quick Start Tutorial
Brightspace Known Issues
Request a sandbox course
Sign-up for Brightspace training sessions
You can find Brightspace help at D2L's website.
Join the Brightspace Community.
Try these Brightspace How-To documents.
Visit our Brightspace FAQs for additional Brightspace information
or schedule a one-on-one session, email, or
call Janice Florent: (504) 520-7418.

Note: Are you doing something innovative in Brightspace or perhaps you've discovered a handy tip? Share how you are using Brightspace in your teaching and learning in The Orange Room.

Image credit: "Cluster of Gears" created by jflorent using Microsoft Designer AI

One of the many benefits of working in Xavier's Center for the Advancement of Teaching and Faculty Development is knowing what's going on across the campus. This often feels particularly true when it comes to research, which more often than not takes place behind the scenes. Everyone may hear about the latest book someone published or the newest grant they were just awarded, but the process that got to those endpoints is usually something that happens outside the spotlight.

Triptych: "Professor in Library," "Lab Researcher," and "Meeting with Student." This composite image was generated using AI, referencing images from the PLOS ONE Collection on The Gender Gap in Science, which are licensed under CC BY 4.0. Original photographs by The Gender Gap in Science / PLOS ONE.

We want to redirect the spotlight onto the process of scholarship. We want to show the campus and the world what kind of research is going on right now. We're launching a new monthly series on the CAT Food Blog to do exactly that. Each month, we will share a new Research Brief profiling the current work of one member of the Xavier faculty. Think of it less like a press release and more like a briefing: Here's what is actually being studied at this moment. The Brief will include a short (3 to 4 minute) video in which the faculty member discusses the question that is presently perplexing them and the methods by which they are trying to answer that question.

Do you know a faculty member whose work deserves a brief? Nominate them. We've set up a very short Microsoft Form to collect the basic details: Research Brief Nominations. Faculty are welcome to self-nominate as well. We know there is more scholarly work going on at the university than anyone can truly fathom. With your help, we hope to shine some light on as much of that work as we can in the coming months and years.

#LearnEverywhereXULA (#LEX) is our award winning Brightspace course that is organized around the eight General Standards for Higher Education set forth in the Quality Matters Higher Education Rubric Sixth Edition. The information, activities, and assignments in the #LEX course aids faculty in developing high quality, well-designed, objective-driven courses on Brightspace for Xavier University of Louisiana (XULA) students.

hot air ballons

When faculty complete the #LEX course, they have the opportunity to expand their horizons even more through #LEX Advanced certification. With the certification, faculty learn about using design and automation features available in Brightspace to apply better pedagogical practices within their courses by making them more user-friendly, accessible, and efficient.

#LEX Advanced takes a deeper dive into tools like Rubrics, Release Conditions, Intelligent Agents, HTML Templates, Awards & Badges, and more. #LEX Advanced certification also includes topics such as accessibility, academic integrity, rethinking assessment strategies in the age of AI, securing online testing environment, online discussions, group work, and video lectures.

A #LEX Advanced badge can be earned for participation in a #LEX Advanced workshop OR for completing its corresponding module in the #LEX course.

Our #LEX Advanced certification has five levels. Faculty can move up a certification level with every fourth #LEX Advanced badge they earn. Complete four modules to earn the #LEX Advanced Level 1 certification. Complete eight modules to earn the #LEX Advanced Level 2 certification. Complete twelve modules to earn the #LEX Advanced Level 3 certification. Complete sixteen modules to earn the #LEX Advanced Level 4 certification. Complete twenty modules to earn the #LEX Advanced Level 5 certification.

Faculty can view the badges they've earned by clicking on Activities in the NavBar and then click on Awards within the #LearnEverywhereXULA course.

Are you interested in becoming #LEX Advanced certified? Attend one of our upcoming #LEX Advanced workshops to start earning your badges. Alternatively, you can earn badges by completing modules in the #LearnEverywhereXULA course.

NOTE: Faculty who are not enrolled in the #LearnEverywhereXULA course can request enrollment using this enrollment request form.

#LEX Advanced Certifications

#LEX Advanced certificate

Congratulations to those faculty who have earned #LEX Advanced Certification!

#LEX Advanced Level 1 Certificate Awardees

  • Ayyad, Dr. Ahlam
  • Bailey-Wheeler, Dr. Janel
  • Bellone-Hite, Dr. Amy
  • DiMaggio, Dr. Stassi
  • Earls, Dr. Martha
  • Edwards, Dr. Andrea
  • Farudi, Dr. Giti
  • Gaudin, Dr. Wendy
  • Gstohl, Dr. Mark
  • Hammer, Dr. Elizabeth Yost
  • Helm, Dr. Amanda
  • Laborde, Dr. Katheryn
  • Ma, Dr. Timmy
  • Manley, Dr. Elizabeth
  • McFerrin, Dr. Harris
  • Nguyen, Dr. Nam A.
  • Plaisance-Meyers, Dr. Sierra
  • Ratnayaka, Dr. Harish
  • Rousselle, Dr. Elizabeth
  • Salm, Dr. Steven
  • Sirohi, Dr. Sunil
  • St. Julien, Dr. Danielle
  • Taylor, Dr. Ashley
  • Todd, Dr. Jason
  • Verma, Dr. Abha

#LEX Advanced Level 2 Certificate Awardees

  • Ayyad, Dr. Ahlam
  • Bailey-Wheeler, Dr. Janel
  • Earls, Dr. Martha
  • Edwards, Dr. Andrea
  • Gstohl, Dr. Mark
  • Hammer, Dr. Elizabeth Yost
  • Helm, Dr. Amanda
  • Ma, Dr. Timmy
  • Ratnayaka, Dr. Harish
  • Rousselle, Dr. Elizabeth
  • Todd, Dr. Jason

#LEX Advanced Level 3 Certificate Awardees

  • Ayyad, Dr. Ahlam
  • Edwards, Dr. Andrea
  • Gstohl, Dr. Mark
  • Hammer, Dr. Elizabeth Yost
  • Ma, Dr. Timmy
  • Todd, Dr. Jason

#LEX Advanced Level 4 Certificate Awardees

  • Ayyad, Dr. Ahlam
  • Edwards, Dr. Andrea
  • Hammer, Dr. Elizabeth Yost
  • Todd, Dr. Jason

Image credits:
image by PDPhotos from Pixabay
"#LEX Advanced Certificate of Completion" by Bart | CC BY 4.0

the word update written on a chalk board

D2L (the company that owns Brightspace) uses Continuous Delivery to update our Brightspace system. The Continuous Delivery model gives us regular monthly updates allowing for incremental and easily integrated changes with no downtime required for our Brightspace system.

Our Continuous Delivery update occurs on the 4th Thursday of each month. D2L provides release notes to help users stay up-to-date with the changes.

Here are some of the updates in the August 2026/20.26.08 release were added to our system:

1) Quizzes – Improved filter and source dropdowns in Question Library

This update improves the source and filter dropdowns in the Browse Existing Questions dialog to better align with Brightspace standards and provide a more consistent experience.

Both dropdowns now include a search option, helping instructors find sources and filters more quickly.

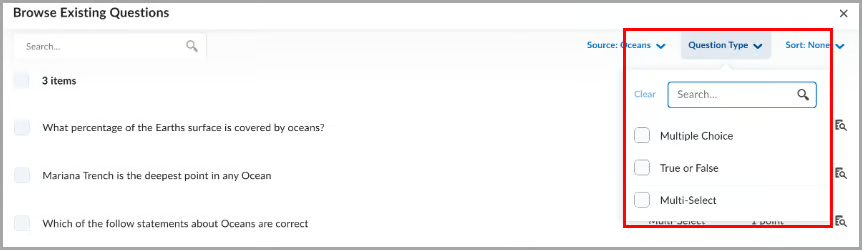
The updated source selector with a search bar highlighted in Question Library.
The Source dropdown with a search field in Question Library.

The updated filter selector with a search bar highlighted in Question Library.
The Filter dropdown with a search field in Question Library.

2) Quizzes – Flag questions and strikethrough answer options

This release introduces the question annotation option in Quizzes. Learners can flag quiz questions to revisit later and apply strikethrough formatting to answer options to help narrow their choices.

Learners can select the bookmark icon the bookmark icon beside a quiz question to flag it for review. Flagged questions appear in the left navigation, allowing learners to quickly return to them.

Learners can also select the strikethrough icon the strikethrough icon beside answer options to eliminate choices they believe are incorrect.

The quiz interface displays multiple-choice questions, with flagged quiz questions highlighted and a strikethrough answer option.
A flagged quiz question with an answer option shown in strikethrough.

Instructors can disable these tools for learners by selecting Hide question annotation tools in the Timing & Display section of the quiz edit page.

The Hide question annotation tools option highlighted in the Timing and Display section of a quiz creation page.

When creating or editing a quiz, in the Timing & Display section, select Hide question annotation tools to disable question flagging and answer option strikethrough for learners.

This feature implements the following PIE item:

  • D7075 (Highlight, strikeout, and flag quiz questions and answer choices)

3) Work To Do widget – Evaluation activities are hidden by default

The Work To Do widget now helps learners with multiple roles, such as teaching assistants, focus on upcoming and overdue work by hiding evaluation activities by default. Previously, the widget displayed both personal course due dates and evaluation tasks for users with multiple roles, making it more difficult to track learner deadlines.
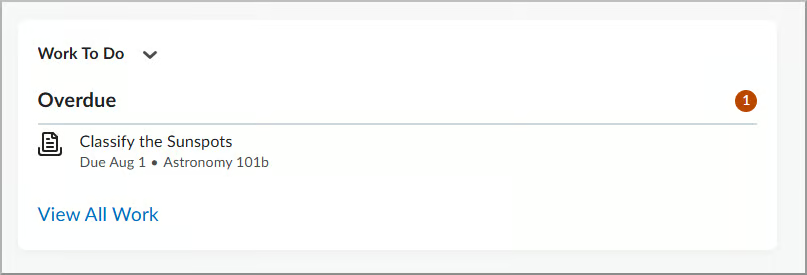
Work To Do widget showing one assignment that is overdue.
The Work To Do widget now filters out evaluation activities by default for users with multiple roles.

This feature implements the following PIE item:

  • D8285 (Allow users to show/hide assignments by Role in Work to Do Widget)

4) Work To Do widget – Automatically marks modules as complete

This release updates the Work To Do widget so that when learners complete all activities in a module, the module is automatically marked as complete and removed from the widget.

Learners now see only activities that still require completion, reducing clutter in the widget.
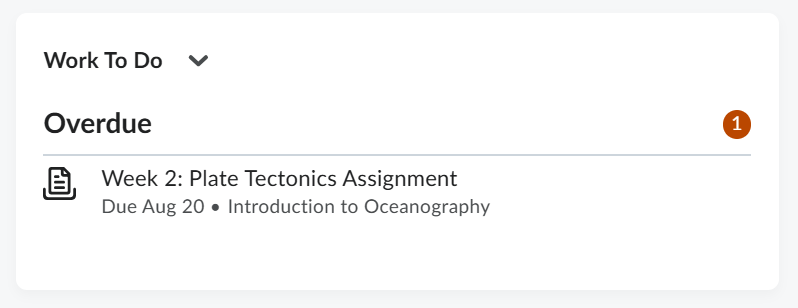
Work To Do widget showing one assignment that is overdue.
In the Work To Do widget, completed modules no longer appear after all module activities are completed.

Previously, completed modules that have due dates could continue to appear as overdue because the module itself was not automatically marked as complete. As a result, learners could see overdue modules that no longer required action and could not be manually dismissed.

NOTE: This change applies only to modules completed after this release. Existing modules that are already overdue continue to appear as overdue.

This feature implements the following PIE item:

  • D8813 (Work to Do - Remove Completed Module Dates)

If you are interested in getting more information about this and all the August Continuous Delivery updates, refer to the Brightspace Platform August 2026/20.26.08 Release Notes.

Additionally, refer to the Brightspace Release Notes for Continuous Delivery Releases, for details about current, past, and to preview upcoming continuous delivery updates.

Want more information?

View current, past, and preview upcoming Continuous Delivery release notes
Instructors Quick Start Tutorial
Brightspace Known Issues
Request a sandbox course
Sign-up for Brightspace training sessions
You can find Brightspace help at D2L's website.
Join the Brightspace Community.
Try these Brightspace How-To documents.
Visit our Brightspace FAQs for additional Brightspace information
or schedule a one-on-one session, email, or
call Janice Florent: (504) 520-7418.

Note: Are you doing something innovative in Brightspace or perhaps you've discovered a handy tip? Share how you are using Brightspace in your teaching and learning in The Orange Room.

Image credit: image by geralt from Pixabay

Notifications enable you to customize what methods you want to use to receive notifications, such as email, as well as what events will trigger notifications.

A man is seated on a bench, working intently on his laptop, enjoying the fresh air and natural surroundings.

Students can control how they receive information about course activity through their notification preferences. They can customize which actions in Brightspace will trigger a notification.

The Notification tool allows users to:

  • Subscribe to a summary of activity for each course and receive a daily email.
  • Specify your preferred email address for instant notifications and announcements.
  • Receive instant notifications about course activity, such as edited content, new discussion posts, assignments, grades, course announcements and upcoming quizzes.

Instructors can help their students to keep up with their coursework by encouraging them to setup their notification preferences. Additionally, there is a Getting Started for Learners Video Playlist that students should watch to get familiar with Brightspace.

Follow these steps to do it.

To customize notification preferences, users should:

  1. From your Personal Menu (located in the Minibar), select Notifications.
  2. select notifications from personal menu

  3. Select the email address to which notifications will be sent.
  4. Select the course activities for which you would like to receive notifications.
  5. Click the Save button at the bottom of the screen.

Want more information?

Navigate Brightspace - Notifications - Learner (video)
Getting Started for Learners Video Playlist
Change Personal Settings in Brightspace

View current, past, and preview upcoming Continuous Delivery release notes
Instructors Quick Start Tutorial
Brightspace Known Issues
Request a sandbox course
Sign-up for Brightspace training sessions
You can find Brightspace help at D2L's website.
Join the Brightspace Community.
Try these Brightspace How-To documents.
Visit our Brightspace FAQs for additional Brightspace information
or schedule a one-on-one session, email, or
call Janice Florent: (504) 520-7418.

Note: Are you doing something innovative in Brightspace or perhaps you've discovered a handy tip? Share how you are using Brightspace in your teaching and learning in The Orange Room.

Image credit: Photo by Jayson from Nappy.co

In Brightspace Tip #562: Microsoft OneDrive, I suggested that you could use the Microsoft OneDrive Learning Tools Interoperability (LTI) integration to easily insert files directly from OneDrive into your Brightspace courses.

Content topic with a warning message alerting users that classic OneDrive LTI tool will be retired on September 17, 2026.
Classic OneDrive LTI tool sunsetting on September 17, 2026

Microsoft released a new Microsoft 365 Document LTI integration to replace the existing classic Microsoft OneDrive LTI integration. The classic Microsoft OneDrive LTI is scheduled to sunset on September 17, 2026. This is important because if you used the classic Microsoft OneDrive LTI integration to insert OneDrive files into your courses, you must take action before September 17th. After that date, any content links in courses using the classic Microsoft OneDrive LTI will stop working. Files created by the classic Microsoft OneDrive LTI will remain accessible through the course's Microsoft 365 Group and SharePoint site. Currently, there's no automatic migration path or copy available from classic Microsoft OneDrive file links to Microsoft 365 Document LTI file links used in Brightspace courses. You can manually migrate files by reselecting and re-linking or embedding the file through the new Microsoft 365 Document LTI in Brightspace course content.

Follow these steps to do it.

One-time per course configuration

Before the new Microsoft 365 Document LTI can be used to link documents in a course, a one-time configuration process must be completed. This one-time configuration must be done in each course.

A content area showing the one-time configuration process to get Microsoft 365 Document LTI setup in your course.
Steps showing the one-time configuration process to get Microsoft 365 Document LTI setup in your course.

During the configuration process, you will be prompted to select Microsoft apps to be enabled. For this step, you should enable OneDrive and disable the other apps as shown in the gif above. Detailed instructions can be found in this Microsoft 365 Document integration guide.

Add OneDrive files to your course modules

Once you complete the one-time (per course) configuration process, you will be able to use the Microsoft 365 Document LTI to add OneDrive files to your Brightspace course modules. From the Existing Activities link, choose Microsoft 365 Document and navigate to locate the file you want to link to.

A content area showing the Existing Activities menu with the Microsoft 365 Document option highlighted
Content area showing the Existing Activities menu with the Microsoft 365 Document option highlighted

Want more information?

Microsoft 365 Document Integration to link OneDrive files in Brightspace
Microsoft 365 LTI app in Brightspace

View current, past, and preview upcoming Continuous Delivery release notes
Instructors Quick Start Tutorial
Brightspace Known Issues
Request a sandbox course
Sign-up for Brightspace training sessions
You can find Brightspace help at D2L's website.
Join the Brightspace Community.
Try these Brightspace How-To documents.
Visit our Brightspace FAQs for additional Brightspace information
or schedule a one-on-one session, email, or
call Janice Florent: (504) 520-7418.

Note: Are you doing something innovative in Brightspace or perhaps you've discovered a handy tip? Share how you are using Brightspace in your teaching and learning in The Orange Room.

Brightspace Pulse is a mobile app that can help learners stay connected and on track with their Brightspace courses. It provides one easy view of course calendars, readings, assignments, evaluations, grades, and announcement items. The app can help learners make better decisions about how to handle their workload, when to submit assignments, and when to prepare for tests. Real-time alerts can let learners know when classes are canceled, class is meeting in an alternate location, or new grades are available. The schedule view and weekly visualization enables learners to quickly at a glance view what is due today, this week, and upcoming across all their courses.

While the Brightspace Pulse app is designed for the learner, instructors can benefit too.

Brightspace Pulse App on iPhone

While the Brightspace Pulse app is designed for the learner, instructors can benefit too. When instructors enter due dates or end dates for assignments and activities the information is populated in the Pulse app enabling learners to stay connected and on track. Thus, instructors can spend less time reminding and more time teaching.

Additionally, using Quicklinks provides direct, easily clickable links to specific course content, assignments, announcements, and more, within Brightspace. This makes it significantly easier for students, especially when using the Pulse app, to quickly find the information or activity they need without having to manually search through modules and sub-modules. This enhances the overall navigation and accessibility of the course for all students, including those who may be using assistive technologies or have learning differences.

Instructors can make their courses Pulse friendly by including due dates or end dates for assignments and activities. When instructors do not enter due dates or end dates, no associated information is available in the Pulse app.

The Pulse app is great for helping students stay on track in face-to-face classes as well. Instructors can set up their face-to-face assignments and activities as events in the Brightspace course calendar. Students will get those date feeds in the Brightspace Pulse app.

Help keep students on track for success in all their courses by using Quicklinks and including a due date or end date for assignments and activities.

Want more information?

Brightspace Pulse App
Manage Your Course Workload with Brightspace Pulse - Learners
Navigate in Brightspace Pulse - Learners
Brightspace Tip #596: Quicklinks
Brightspace Tip #533: Due Dates
Pulse Dates - Set Date Restrictions for Content (video)
Pulse Dates - Set Date Availability for a Calendar Event (video)
Brightspace Tip #597: Manage Dates
Brightspace Tip #268: Drip-Feeding

View current, past, and preview upcoming Continuous Delivery release notes
Instructors Quick Start Tutorial
Brightspace Known Issues
Request a sandbox course
Sign-up for Brightspace training sessions
You can find Brightspace help at D2L's website.
Join the Brightspace Community.
Try these Brightspace How-To documents.
Visit our Brightspace FAQs for additional Brightspace information
or schedule a one-on-one session, email, or
call Janice Florent: (504) 520-7418.

Note: Are you doing something innovative in Brightspace or perhaps you've discovered a handy tip? Share how you are using Brightspace in your teaching and learning in The Orange Room.

calendar

Instructors can use the Manage Dates tool to view, edit in bulk, and bulk offset date availability from one central location. You can also set the calendar status of all content topics and modules, discussion topics and forums, assignment submissions folders, grades categories and items, announcement items, quizzes, checklists, and surveys in their course in the Manage Dates tool.

Course objects display in a grid that you can sort by any of the column headings. You can also use the Type column to sort the Manage Dates page based on the tool-specific order and use advanced filter options to work with smaller sets of objects. If you filter your course objects, any bulk changes you make apply only to the filtered results. This enables you to update multiple availability dates based on specific criteria.

In addition to managing dates, you can open each course object in a new window by clicking on its name. This launches the object's edit page where you can edit additional properties for that object without leaving the Manage Dates tool.

The Manage Dates tool can be very useful after a course copy. For example, if you copied content from one course into another course, you can use the Manage Dates tool to easily adjust dates after the course copy. Additionally, if you've entered dates on items in your course and later need to adjust dates in bulk, try using the Manage Dates tool.

Follow these steps to do it.

To edit dates in bulk:

  1. Get into the course you want to change the dates of course objects.
  2. On the NavBar (of the course you want to change dates in), click Course Admin.
  3. Click Manage Dates.
  4. Select the check box of the items for which you want to bulk edit dates.
  5. Click Bulk Edit Dates.
  6. In the Bulk Edit Dates dialog box, update the due dates and availability dates.
  7. Click Save.

Want More Information?

About Manage Dates
Bulk edit dates in Manage Dates
Manage Dates - Offset Dates (video)

View current, past, and preview upcoming Continuous Delivery release notes
Instructors Quick Start Tutorial
Brightspace Known Issues
Request a sandbox course
Sign-up for Brightspace training sessions
You can find Brightspace help at D2L's website.
Join the Brightspace Community.
Try these Brightspace How-To documents.
Visit our Brightspace FAQs for additional Brightspace information
or schedule a one-on-one session, email, or
call Janice Florent: (504) 520-7418.

Note: Are you doing something innovative in Brightspace or perhaps you've discovered a handy tip? Share how you are using Brightspace in your teaching and learning in The Orange Room.


Image credit: calendar by tigerlily713 from Pixabay