Brightspace, our Learning Management System (LMS), is designed with accessibility in mind. However, it is the responsibility of the instructor and/or course designer to ensure their course content is formatted using best practices for accessibility; including the use of good heading structure, text formatting, contrast and color, descriptive links, alternative text, tables, lists, etc.
I am writing a series of accessibility related blog posts that will provide suggestions on how you can make small changes when creating course content to make it accessible. This is the seventh tip in my series of accessibility related blog posts and it focuses on tables.
A table is a means of arranging information into rows and columns. Tables are very useful for displaying data in an organized manner. Your course schedule and office hours are examples where formatting this information in a table could make it more accessible.

Tables should be avoided when you want to simply format other content (i.e., just to line things up neatly.) Using tables just for layout purposes is not the best practice for accessibility and may make it nearly impossible for people who use assistive technologies to access the information. If you do choose to use a table to layout text on the page, make sure you lay it out so it will make sense when read from left to right. Text-to-speech software by default will read the information in a table left to right, cell by cell, and row by row.
This video shows how a screen reader reads information in tables. There is an example of a good and a bad table layout. The video demonstrates how reading order AND the information in the columns are important considerations when creating accessible tables.
In the bad example in the video, the use of the dash and abbreviations for the months can be confusing when read by a screen reader. The abbreviated months would have been less confusing if the year had been included. The use of 1,2,3 in the "Week" column in the bad example can be confusing as well. A better option is to use Week 1, Week 2, Week 3 in the respective column.
When creating tables, read your table left to right, top to bottom (never repeating a cell). Does it make sense? Keep in mind that a screen reader will read tables in this way. If it doesn't make sense, you should reorganize the table so that it makes sense when read left to right, top to bottom without repeating a cell.
Consider these examples of accessible tables:

The tables, in the examples above, make sense when read left to right, top to bottom, without repeating a cell.
Follow these tips when creating tables to make them accessible:
- Do not use tabs or spaces to create tables. It may look like a table; however it will not be recognized as a table and can be confusing when read by assistive technologies.
- Add Row and Column Headers to tables to distinguish the heading text from the data area of the table. Screen readers read simple tables efficiently when the column or row headers are clearly defined.
- Repeat Row Headers if the table spans more than one page. Tables that are contained on multiple pages should have the header row repeated on each page.
- When you use tables for the presentation of data, summarize the table to aid reader comprehension. This helps all students to know the high points of a table.
- Break up complex tables (nested tables and merged or split cells inside of tables) into a series of simple tables. Simple tables are more usable for everyone.
- The information in each cell should make sense if read without the column heading. For example, instead of entering 1, 2, 3, in a "Chapter" column you should enter Chapter 1, Chapter 2, Chapter 3, in the cells to make it clearer when read by a screen reader.
When applying structure to documents and web content, you should use the appropriate built-in formatting structure tools to do so. Doing so will make content accessible to everyone, including users of assistive technology.
Creating tables in MS Word:
- On the Insert tab choose Insert Table and select the appropriate number of rows and columns for your table.
- Select the header row in the table and press the right mouse button. A Table Properties window will open.
- Select the Row tab and check the box next to Repeat as header row at the top of each page. Press Enter key or Ok button. This header row will be repeated at top of each page.

Creating tables in PowerPoint:
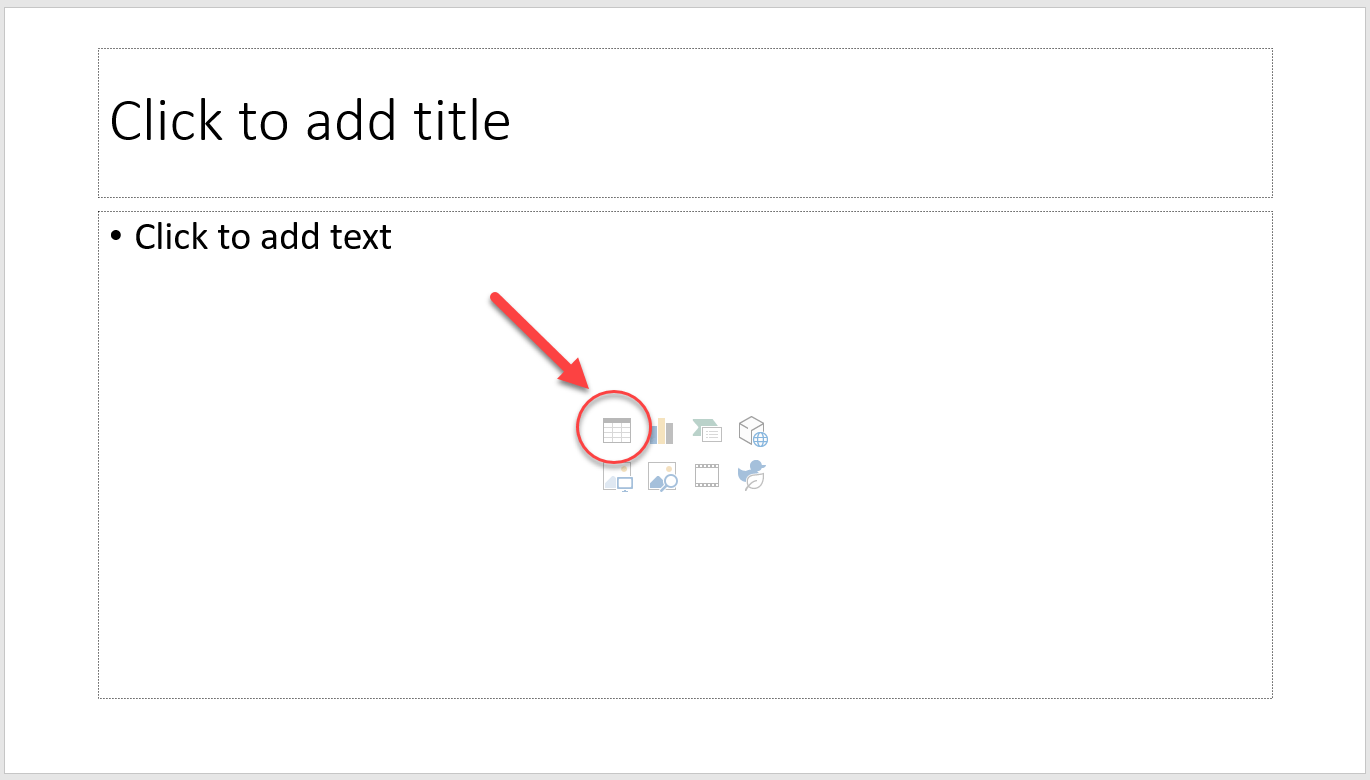
- Use the Insert Table function in the Slide layout, select the appropriate number of rows and columns for your table.
Alternatively you can insert a table:
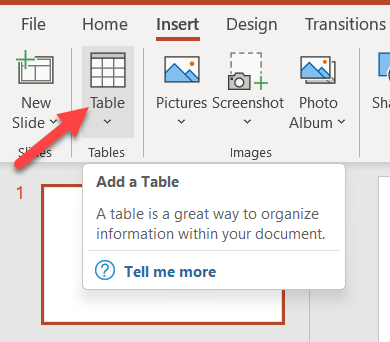
- From the Insert tab, click the Table command.
- A drop-down menu containing a grid of squares will appear. Hover the mouse over the grid to select the number of columns and rows in the table.
Working with tables in the Brightspace Editor:
To create a table in the Brightspace Editor:
- Place your cursor in the text area where you would like to insert the table.
- Click the insert/edit table function and select the appropriate number of rows and columns for your table to begin adding a table in the text area.

To create column headers:
- Highlight the entire row that you want to mark up as a table header. Alternatively you can put your cursor in one of the cells you want to mark up as a table header.
- Then click on the drop-down menu next to the Table icon in the toolbar.
- Choose Cell and then Cell Properties. The Cell properties window will pop-up.
- In the Cell type field, click on the drop-down list and select Header cell.
- Click Save. You will know you have successfully changed the row to table headers because the look of the table cells will change.
- Repeat for each cell that is a column header.


You will remove significant barriers for users of assistive technology if you take these suggestions into consideration when creating course content. An added bonus is that if you include properly structured tables when creating your course content you will be ahead of the game in the event you do have a student who requires the use of assistive technology. Remember a properly structured table is good design and can benefit everyone.


