The Grade Center is more than just a way to record students' grades. It's a dynamic and interactive tool, allowing instructors to record data, calculate grades, and monitor student progress. In addition to being able to record grades, instructors can track student work and share private comments and feedback with students throughout the semester.

The Grade Center is integrated with gradable items such as tests, assignments, discussion boards, blogs, journals, wikis, and ungraded items, such as surveys and self-assessments. Instructors can create Grade Center columns for activities and/or requirements done outside of Blackboard, such as exams given on paper, oral presentations, and participation.
Students also benefit when their instructor uses the Grade Center. Students have the opportunity to adjust their approach to learning to improve their performance when they see their grades and instructor feedback.
Follow these steps to do it.
Listed below are links to previous Bb tips on using the Grade Center:
- Setting up the Grade Center (PDF)
- Create calculated column
- Color coding Grade Center columns
- Using categories
- Smart Views
- Needs grading
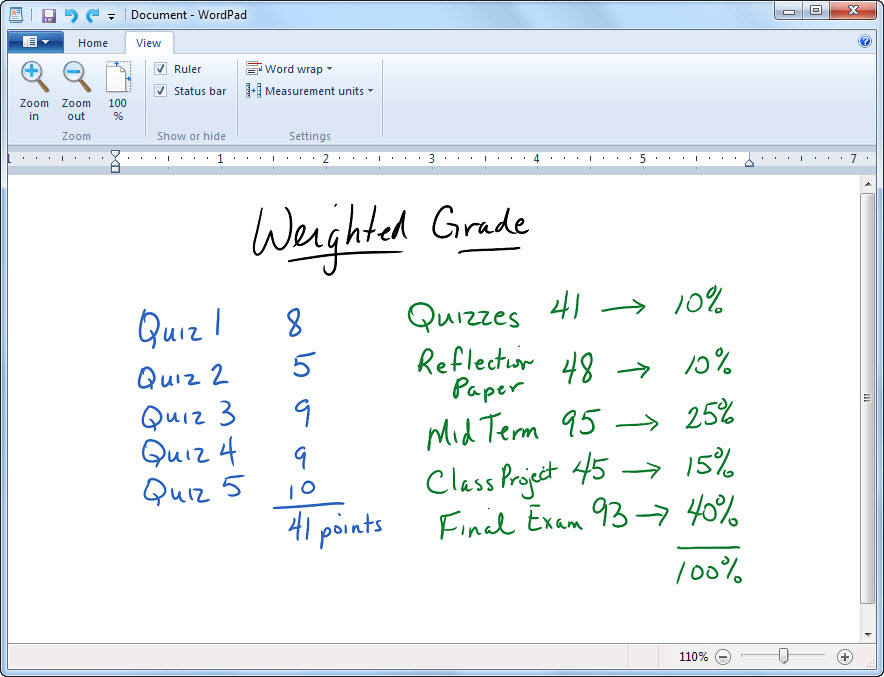
- Weighting grades
- Understanding weighted grades
- Row visibility
Want more information?
Working with the Grade Center
Try these Blackboard How-To documents
Explore Blackboard’s On Demand Learning Center
Visit our Blackboard FAQs for additional blackboard information
or schedule a one-on-one session, email, or
call Janice Florent: (504) 520-7418.


