 Instructors Quick Start Tutorial
Also, did you know there is a virtual assistant that is integrated directly into Brightspace? If this is news to you, refer to Brightspace Tip #413: Brightspace Virtual Assistant to find out more about it.

Additionally, if you are having difficulties using any of the course tools, you can get help from D2L. This help is available 24/7 via Email and Live Chat. You will find options to request Email Support and Live Chat Support in the Brightspace Virtual Assistant. You must be logged into Brightspace to access the Brightspace Virtual Assistant.

Want more information?
View current, past, and preview upcoming Continuous Delivery release notes
Instructors Quick Start Tutorial
Brightspace Known Issues
Request a sandbox course
Sign-up for Brightspace training sessions
You can find Brightspace help at D2L's website.
Join the Brightspace Community.
Try these Brightspace How-To documents.
Visit our Brightspace FAQs for additional Brightspace information
or schedule a one-on-one session, email, or
call Janice Florent: (504) 520-7418.
Note: Are you doing something innovative in Brightspace or perhaps you've discovered a handy tip? Share how you are using Brightspace in your teaching and learning in The Orange Room.
Brightspace Tip #420: Setup Your Spring Courses
Our Information Technology Center (ITC) has created the spring courses in Brightspace.
NOTE: You should see your spring courses in the My Courses widget. If you do not see your spring courses in your My Courses widget, you should click on the link to "View All Courses" (located at the bottom of the My Courses widget). Verify that you are listed as the instructor for the course in Banner. You can find more information about the updated My Courses Widget sort logic at this link.
As you prepare to teach this spring, you can get started setting up your Brightspace courses. To get started, you can post your syllabus, course documents, announcements, and setup your Grade Book in your Brightspace courses. You can also customize your course homepage and/or course image/banner.

If you teach a course that is cross listed you will have a Brightspace course for each cross listing. You can combine the cross listed courses into one Brightspace course so that you can post course materials and grades to one combined Brightspace course. Combining courses may also work for you if you are teaching different sections of the same course and would like to have the different sections combined into one Brightspace course so that you can post course documents and grades in the one combined course. The beginning of the semester is the best time to submit a request to merge your Brightspace courses before you add course materials or grades to the courses.
Additionally, if the spring course you are teaching is the same as one of your previous courses you can copy the entire course (or copy components) into your "empty" Brightspace spring course.
NOTE: ITC will enroll students in the Brightspace courses at the end of the registration process, usually the night before the start of classes for the semester. If you want to view your class enrollments or email your students before they are enrolled in your Brightspace course, you can do so in Banner or through EAB.
About Inactive Courses:
When ITC creates the Brightspace courses, they are set to inactive by default. Instructors have access to inactive courses but students who are enrolled in an inactive course do not have access to it. Faculty have no control over the active/inactive status of courses. Brightspace will not send alerts or notifications from inactive courses.
ITC will make courses active after the first deregistration (dereg) of students who are not fiscally cleared. At that point students will be able to access to their courses. The dereg process usually occurs after registration. The registrar informs ITC of when the dereg process is complete.
Follow these steps to do it.
Listed below are links with instructions to:
- Request Master Course Shells
- Merge Courses
- Copy Course or Copy Components
- Manage Dates
- Instructors Quick Start Tutorial
- Getting Started for Instructors Video Playlist
- Add Profile Picture to Humanize Your Course
- Change the Name of Your Course
- Change Course Image
- Customize Your Course Homepage
- Content Tool Quick Reference (pdf)
- Organizing Content in Brightspace
- Brightspace Editor
- Understanding the Grades Tool
- Create an Announcement (video)
- My Courses Widget
- View Course as a Student
Want more information?
View current, past, and preview upcoming Continuous Delivery release notes
Instructors Quick Start Tutorial
Brightspace Known Issues
Request a sandbox course
Sign-up for Brightspace training sessions
You can find Brightspace help at D2L's website.
Join the Brightspace Community.
Try these Brightspace How-To documents.
Visit our Brightspace FAQs for additional Brightspace information
or schedule a one-on-one session, email, or
call Janice Florent: (504) 520-7418.
Note: Are you doing something innovative in Brightspace or perhaps you've discovered a handy tip? Share how you are using Brightspace in your teaching and learning in The Orange Room.
Brightspace Tip #419: End-of-Semester Tasks

As we approach the end of the semester there are a few things you can do in Brightspace to wrap up for the semester.
Release final course grades
- Unlike other grade items and categories in the Grade Book, final grades are not available to students by default. Final grades must be released. If you did not choose to enable the automatic release of final grades when setting up your Grade Book, you will have to manually release final grades in order for students to see their final grade.
Export your Grade Book
- Student access to courses is removed two weeks after the end of a semester. This process of making the courses inactive allows student work and grades to be visible to instructors but students no longer have access to the course. Courses will remain on the Brightspace system for three semesters before they are removed. You should export (download) your Grade Book to your Microsoft OneDrive after you submit your final grades.
NOTE: The export file that is created will NOT contain any student work or instructor feedback. Only the grades in your Grade Book will be exported.
Create a master copy of your course
- Courses remain on the Brightspace system for three semesters before they are removed. You can request a Master Course Shell that you can use to develop and maintain your course materials. Master Course Shells will not be removed from the Brightspace system.
Follow these steps to do it.
Instructions are available for releasing final course grades, exporting your Grade Book, and requesting Master Course Shells.
Want more information?
Release Final Grades
Export your Grade Book (video [2:03])
Master Copies of Courses
View current, past, and preview upcoming Continuous Delivery release notes
Instructors Quick Start Tutorial
Brightspace Known Issues
Request a sandbox course
Sign-up for Brightspace training sessions
You can find Brightspace help at D2L's website.
Join the Brightspace Community.
Try these Brightspace How-To documents.
Visit our Brightspace FAQs for additional Brightspace information
or schedule a one-on-one session, email, or
call Janice Florent: (504) 520-7418.
Note: Are you doing something innovative in Brightspace or perhaps you've discovered a handy tip? Share how you are using Brightspace in your teaching and learning in The Orange Room.
Brightspace Tip #418: Grade Book – Adjust Final Grades
Brightspace calculates final grades for each student based on the grading system and the students' grades that are entered into the Grade Book. If the instructor wants more control over the final grades, perhaps to adjust the final grade for a student that is on the cusp of a higher grade, then adjusted final grades can be used and released to students instead of the calculated final grade.

If the instructor decides to use adjusted final grades for one student in the course, adjusted final grades must be used for all students in the course. This does not imply, however, that final grades must be manually adjusted for all students.
Adjusting final grades are implemented by the instructor for only the student or students that are deemed to need an adjusted grade. The remaining students final grades would be the final grade as calculated in the Grade Book.
Note: The Grade Book must be configured to use adjusted final grades. If you plan to use adjusted final grades, you should make the adjustments before you release final grades.
Follow these steps to do it.
To adjust final grades for all students:
- Get into the course where you want to adjust final grades and click Grades in the NavBar.
- Click on the Enter Grades link.
- Scroll over to the Final Calculated Grade column and click on the arrow on the right of the column name and select Enter Grades.
- In the Final Adjusted Grade section for each student, enter the adjusted grades and then click Save.
- Once you have ensured that students' grades are accurate, you can release the final grades.
To adjust final grades for one or more specific students:
- Get into the course where you want to adjust final grades and click Grades in the NavBar.
- Click on the Enter Grades link.
- Scroll over to the Final Calculated Grade column and click on the arrow on the right of the column name and select Enter Grades.
- Click on the arrow on the right of the Final Grades and click Transfer All, then click Yes.
- In the Final Adjusted Grade section, enter adjusted scores where necessary and click Save.
- Once you have ensured that students' grades are accurate, you can release the final grades.
Want more information?
Understanding the Grades Tool (video)
Troubleshoot Final Grades (video)
Adjusted Final Grades
Release Final Grades
Brightspace Tip #351: Grade Book
View current, past, and preview upcoming Continuous Delivery release notes
Instructors Quick Start Tutorial
Brightspace Known Issues
Request a sandbox course
Sign-up for Brightspace training sessions
You can find Brightspace help at D2L's website.
Join the Brightspace Community.
Try these Brightspace How-To documents.
Visit our Brightspace FAQs for additional Brightspace information
or schedule a one-on-one session, email, or
call Janice Florent: (504) 520-7418.
Note: Are you doing something innovative in Brightspace or perhaps you've discovered a handy tip? Share how you are using Brightspace in your teaching and learning in The Orange Room.
Brightspace Tip #417: Grade Book – Release Final Grades

Unlike other grade items and categories in the Grade Book, final grades are not available to students by default. Final grades must be released. When setting up the Grade Book, the instructor can choose to automatically release final grades so that the students can see their final grade throughout the semester. If you did not choose to enable the automatic release of final grades when setting up your Grade Book, you will have to manually release final grades in order for students to see their final grade.
Additionally, you can selectively release final grades for some students now and release the final grades for other students later. For example, you can release the final grades for graduating seniors on one date and release the final grades for everyone else on a later date.
Follow these steps to do it.
To manually release final grades:
- On the NavBar, click Grades.
- On the Enter Grades page, from the Final Calculated Grade or Final Adjusted Grade context menu, click Enter Grades.
- To release grades for all users, on the Final Grades page, from the Final Grades context menu, click Release All. To release final grades for a specific user, do one of the following:
- Select the check box by the user name and click the Release/Unrelease link.
- Select the check box in the Release Final Calculated Grade or Release Adjusted Final Grade column.
- Click Save.
OR watch this video for instructions on how to release final grades:
Want more information?
Troubleshoot Final Grades (video)
Adjust Final Grades
Release Final Grades
Brightspace Tip #351: Grade Book
View current, past, and preview upcoming Continuous Delivery release notes
Instructors Quick Start Tutorial
Brightspace Known Issues
Request a sandbox course
Sign-up for Brightspace training sessions
You can find Brightspace help at D2L's website.
Join the Brightspace Community.
Try these Brightspace How-To documents.
Visit our Brightspace FAQs for additional Brightspace information
or schedule a one-on-one session, email, or
call Janice Florent: (504) 520-7418.
Note: Are you doing something innovative in Brightspace or perhaps you've discovered a handy tip? Share how you are using Brightspace in your teaching and learning in The Orange Room.
Image credit: "final grades" by jflorent is dedicated to public domain under CC0 and is a derivative of grade by OpenClipart-Vectors on Pixabay
Brightspace Tip #416: Get Feedback From Your Students

Instructors can create surveys in Brightspace and use the statistics tools to monitor current course trends, seek opinions, and assess user satisfaction.
Surveys are an excellent way to solicit feedback from learners regarding any aspect of a course. You can gather anonymous or non-anonymous opinions and information from users. Unlike Quizzes, survey questions do not have to have right or wrong answers and Likert-style rating questions are possible.
Some examples of the types of uses for surveys are: seeking feedback on the effectiveness of active learning exercises, the need for clarification of course material, and/or seeking suggestions for course improvement.
ICYMI, read my New Twist on End-of-Semester Evaluations blog post.
Follow these steps to do it.
To create a survey:
- On the NavBar, click Activities, then click Surveys.
- On the Manage Surveys page, click New Survey.
- Enter a Name and select additional settings for your survey (e.g. choose the option to give instant feedback and/or make results anonymous).
- To add questions directly to the survey, click Add/Edit Questions. Alternatively, you can add questions from the Question Library.
- Click Done Editing Questions to return to the survey page.
- Click the Restrictions tab to modify the survey's availability.
- Uncheck the Hide from Users checkbox.
- Specify a date range for the survey, if appropriate.
- Set the attempts allowed for the survey.
- Click Save and Close.
To track survey progress and results:
Based on how you have set up the survey properties, you might see a list of all users or just the overall survey results with anonymous responses.
- On the NavBar, click Activities, then click Surveys.
- On the Manage Surveys page, click the context menu next to the name of your survey and click Statistics.
- In the Users tab, search for users and their listed attempt types. You can restrict your search of survey results by attempt in the Attempts tab.
- To view a specific user's results, click on an individual attempt. To view the number of attempts per question within a survey, click View Overall Results at the bottom of the page.
Want more information?
Setup a Survey (video)
Track Survey Progress and Results
Question Library Quick Reference Guide (pdf)
Benefits of Question Library (video)
Create a New Question (video)
Import Questions into Question Library (video)
View current, past, and preview upcoming Continuous Delivery release notes
Instructors Quick Start Tutorial
Brightspace Known Issues
Request a sandbox course
Sign-up for Brightspace training sessions
You can find Brightspace help at D2L's website.
Join the Brightspace Community.
Try these Brightspace How-To documents.
Visit our Brightspace FAQs for additional Brightspace information
or schedule a one-on-one session, email, or
call Janice Florent: (504) 520-7418.
Note: Are you doing something innovative in Brightspace or perhaps you've discovered a handy tip? Share how you are using Brightspace in your teaching and learning in The Orange Room.
Image credit: "Feedback" by Dennis Skley is licensed under CC BY-ND 2.0
Brightspace Tip #415: November Continuous Delivery Updates

D2L (the company that owns Brightspace) uses Continuous Delivery to update our Brightspace system. The Continuous Delivery model gives us regular monthly updates allowing for incremental and easily integrated changes with no downtime required for our Brightspace system.
Our Continuous Delivery update occurs on the 4th Thursday of each month. D2L provides release notes to help users stay up-to-date with the changes.
Here are a few updates in the November 2023/20.23.11 release that were added to our system this month:
1) Announcements – Copy announcements to other courses
This feature adds the ability to copy announcements to other courses when the new permission Announcements > Copy to Other Courses is enabled for the user role. Users must be enrolled in both the source and destination courses with a role that has the new permission enabled to copy announcements. The permission is disabled by default for all roles.
A single announcement can be copied to multiple course offerings. Users can copy announcements from the Announcements tool or the Announcements widget from the context menu of an announcement by selecting Copy to Other Courses. Once copied, the announcement is in a draft state and users must publish the copied announcement in the destination course to complete the copying process.
The following attributes are copied:
- Headline
- Display Author Information
- Content - Note: The copied Content attribute includes any associated files such as inserted images.
- Start and End Date
- Attachments
- Pin state
Note: Release Conditions are not copied.

This feature implements the following PIE item D10642 (Send Announcements to Multiple Courses at Once).
2) Assignments and Discussions – Review key assessment information when publishing evaluations
The Publish All dialog for Assignments and Discussions is improved and standardized to show key information about learner evaluations. Dialog messaging is consistent for both Assignments and Discussions as it notes complete and incomplete learner evaluations and other key information, like how many learners have feedback and how many learners or groups are assigned to an activity. This change improves the user experience by including additional information about the status of learner evaluations and creating evaluation consistency across Brightspace.
Previously, the Publish All dialog did not display any information about learner evaluations or other key information, and the dialog messaging was not consistent across the Assignments and Discussions tools.

3) Quizzes – Deduction option for incorrect answers
Instructors now have the option to set up a quiz to deduct a percentage of a question’s point value for incorrect answers submitted. This feature applies specifically to question types that can be auto-graded, for example, multiple-choice and true or false questions. The only question type that can’t be auto-graded is written response.

Instructors can also enter negative values when manually grading individual quiz questions or manually updating all quiz question attempts from the Quizzes tool.

To ensure that instructors can view accurate quiz statistics, Question Statistics are also updated to account for this new functionality. Therefore, if negative grading is enabled, Question Statistics may display the following differences in statistics:
- Point Biserial results may be lower when negative grading is enabled.
- Standard Deviation has a wider distribution to account for negative grading.
- Questions with a negative average score appear below zero in the Grade Distribution graph.

To ensure that learners are fully aware that negative marking is enabled for a quiz, the Summary page of a quiz explicitly notifies the learner that for each question answered incorrectly, a percentage of that question's point value is deducted from the final attempt grade.

Also, learners are given the opportunity to explicitly clear previously-selected answers to auto-graded questions by clicking Clear Selection. This gives learners the opportunity to leave the question blank and receive a mark of zero (0), instead of forcing them to guess and enter an answer that could possibly incur a percent deduction.

Learners who are given the ability to view questions after submitting their quiz by their instructor can review questions that received negative score deductions for incorrect answers.

Previously, instructors could not set a quiz to deduct a percentage of a question's point value for incorrect answers submitted.
Note: The overall quiz score cannot be negative and caps at zero.
If you are interested in getting more information about these and all the November Continuous Delivery updates, refer to the Brightspace Platform November 2023/20.23.11 Release Notes.
Additionally, refer to the Brightspace Release Notes for Continuous Delivery Releases, for details about current, past, and to preview upcoming continuous delivery updates.
Want more information?
View current, past, and preview upcoming Continuous Delivery release notes
Instructors Quick Start Tutorial
Brightspace Known Issues
Request a sandbox course
Sign-up for Brightspace training sessions
You can find Brightspace help at D2L's website.
Join the Brightspace Community.
Try these Brightspace How-To documents.
Visit our Brightspace FAQs for additional Brightspace information
or schedule a one-on-one session, email, or
call Janice Florent: (504) 520-7418.
Note: Are you doing something innovative in Brightspace or perhaps you've discovered a handy tip? Share how you are using Brightspace in your teaching and learning in The Orange Room.
Brightspace Tip #414: October Continuous Delivery Updates
D2L (the company that owns Brightspace) uses Continuous Delivery to update our Brightspace system. The Continuous Delivery model gives us regular monthly updates allowing for incremental and easily integrated changes with no downtime required for our Brightspace system.
Our Continuous Delivery update occurs on the 4th Thursday of each month. D2L provides release notes to help users stay up-to-date with the changes.
Here are a few updates in the October 2023/20.23.10 release that were added to our system this month:
1) Brightspace Editor – Users can set the Text Direction attribute for the entire page
This feature allows instructors, when creating Content or Widgets, to set the directionality for all text on a page when using the Attributes menu in Brightspace Editor. The Text Direction attribute can be applied to the entire page by navigating to Attributes > Page Attributes and selecting the desired text direction. The attribute can have text be Default, Left to Right or Right to Left.
Previously it was only possible to set the text direction attribute on Selected Items.

2) Assignments and Discussions – Limit for field restrictions enforced
When evaluating activities in Assignments and Discussions, users can no longer use the Publish or Save Draft buttons if their evaluation exceeds the limit for field restrictions. This limitation applies to the Overall Grade, Overall Feedback, and Annotations fields. Previously, a warning was displayed in the Overall Feedback field when the limit was reached, but the limitation was not enforced; and users could continue attempting to save their evaluation by clicking Publish or Save Draft.
3) Chat – Intent to end-of-life for Chat
With this release, users accessing the Chat tool now see a banner indicating the tool will no longer be available as of January 2024.

For more information about this update, refer to Intent to End Of Life Notice for: Chat.
4) Pulse App – Accessibility improvements
Brightspace Pulse app is updated to provide a more consistent assistive technology experience between iOS and Android platforms. In addition, there is an added option to enable 3rd Party cookies within the Pulse app settings. As a result of these changes, users are required to log back in to the Pulse app.
If you are interested in getting more information about these and all the October Continuous Delivery updates, refer to the Brightspace Platform October 2023/20.23.10 Release Notes.
Additionally, refer to the Brightspace Release Notes for Continuous Delivery Releases, for details about current, past, and to preview upcoming continuous delivery updates.
Want more information?
View current, past, and preview upcoming Continuous Delivery release notes
Instructors Quick Start Tutorial
Brightspace Known Issues
Request a sandbox course
Sign-up for Brightspace training sessions
You can find Brightspace help at D2L's website.
Join the Brightspace Community.
Try these Brightspace How-To documents.
Visit our Brightspace FAQs for additional Brightspace information
or schedule a one-on-one session, email, or
call Janice Florent: (504) 520-7418.
Note: Are you doing something innovative in Brightspace or perhaps you've discovered a handy tip? Share how you are using Brightspace in your teaching and learning in The Orange Room.
Brightspace Tip #413: Brightspace Virtual Assistant
Brightspace Virtual Assistant (BVA) is a new AI-based help tool that is integrated directly into Brightspace. The BVA appears as a pop-up from the speech bubble button in the bottom right-hand corner of the screen.

The tool provides immediate access to help documentation so users do not have to do research in another browser tab or window. After typing in a question, the tool provides persona-specific documentation available in Brightspace Community.

Persona-specific information is derived from the user’s role in Brightspace, for example:
- Instructors can find persona-specific step-by-step guides and video tutorials on how to set up a course and other activities.
- Students/Learners can find help documentation related to their Brightspace how-to questions without having to leave the page.
- Administrators can find resources to complete tasks with how-to instructions available directly in the right-hand corner of their page.
All users have the option for further assistance. Brightspace Virtual Assistant contains options to Ask the Community or to contact Support for further assistance by email or chatting with a live agent.
Brightspace Virtual Assistant is available in all four EUS-supported languages: English (CA), French (CA), Spanish, and Brazilian Portuguese. The user’s chosen Language and Locale settings in their profile determine the language of the Brightspace Virtual Assistant output messages, the language of the support articles provided, and the language of the support received by email, or chat.
Note: If a user’s chosen Language and Locale setting is not supported, the default language is English.
Update: Brightspace Virtual Assistant was renamed Lumi Chat in September 2024.
Want more information?
Brightspace Virtual Assistant (i.e. Lumi Chat)
View current, past, and preview upcoming Continuous Delivery release notes
Instructors Quick Start Tutorial
Brightspace Known Issues
Request a sandbox course
Sign-up for Brightspace training sessions
You can find Brightspace help at D2L's website.
Join the Brightspace Community.
Try these Brightspace How-To documents.
Visit our Brightspace FAQs for additional Brightspace information
or schedule a one-on-one session, email, or
call Janice Florent: (504) 520-7418.
Note: Are you doing something innovative in Brightspace or perhaps you've discovered a handy tip? Share how you are using Brightspace in your teaching and learning in The Orange Room.
Brightspace Tip #412: Pronouns
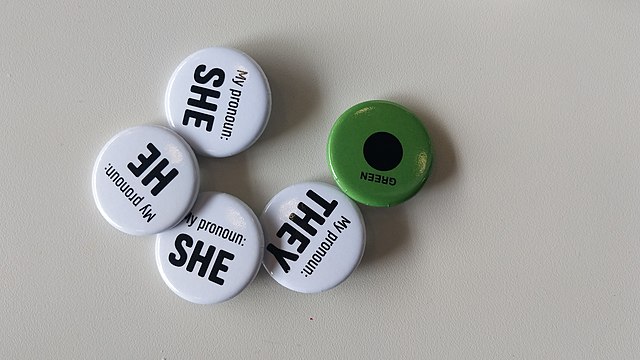
Wednesday, October 18th, is International Pronouns Day. International Pronouns Day is celebrated on the third Wednesday of October and seeks to make respecting, sharing, and educating about personal pronouns commonplace. Referring to people by the pronouns they determine for themselves is basic to human dignity. Being referred to by the wrong pronouns particularly affects transgender and gender nonconforming people. For more information about International Pronouns Day visit pronounsday.org.
ICYMI, read Bart’s “Yes, you should totally tell your students your pronouns” blog post.
Did you know, users now have the option to indicate their pronouns in their Brightspace user profiles? Brightspace user profiles are visible to anyone who shares a course with a particular user, including students, instructors, administrators, etc.


Celebrate International Pronouns Day by entering your pronouns into Brightspace and invite your students to do the same.
If you are looking for a good pronoun primer on inclusive teaching, check out this Gender Diversity and Pronouns resource from the University of Michigan.
Also, check out name.pn if you or your students are looking for an easy way to share how you would like people to use your name. You can create a URL that links to information to help users get your preferred pronouns, title, and the pronunciation of your name correct.
Follow these steps to do it.
To enter your pronouns:
- From your Personal Menu click on Account Settings.
- Check the Allow others to see my pronouns box.
- Click on the Use different pronouns radio button and enter your pronouns.
- Click on Save and Close.
Want more information?
How to set your Pronouns
Navigate Brightspace Learning Environment - Account Settings – Learner (video)
View current, past, and preview upcoming Continuous Delivery release notes
Instructors Quick Start Tutorial
Brightspace Known Issues
Request a sandbox course
Sign-up for Brightspace training sessions
You can find Brightspace help at D2L's website.
Join the Brightspace Community.
Try these Brightspace How-To documents.
Visit our Brightspace FAQs for additional Brightspace information
or schedule a one-on-one session, email, or
call Janice Florent: (504) 520-7418.
Note: Are you doing something innovative in Brightspace or perhaps you've discovered a handy tip? Share how you are using Brightspace in your teaching and learning in The Orange Room.
Image Credit: "pronoun badges at State of the Map 2019" by Edward is licensed under CC BY-SA 4.0