Thursday, May 21st, is Global Accessibility Awareness Day (GAAD). GAAD aims to get you talking, thinking, and learning about digital access/inclusion and people with different abilities and talents.
Accessibility is about everyone. It is extremely important for students with disabilities to have access to accessible course content. This includes having access to accessible email.
In a series of accessibility related blog posts, I provide suggestions on how you can make small changes to make your materials accessible. This is the eighth tip in my series of accessibility related blog posts and it focuses on email.
Accessible emails ensure that everyone, including people using assistive technologies like screen readers or visual aids, can read and interact with your messages. Many of the same accessibility principles for content creation also apply to email.
Key Accessibility Best Practices
To make sure your emails are fully inclusive, follow these design and formatting rules:
Formatting: Break content into short paragraphs and use built-in heading styles (Heading 1, Heading 2) to help users scan your email.
Font and Size: Use legible, sans-serif fonts (like Arial, Calibri, or Helvetica) at 12pt or larger. Avoid using italics or complex decorative fonts.
Use Color Mindfully: Ensure there is high contrast between your text color and background. Never rely solely on color to convey information.
Hyperlinks: Write descriptive link text (e.g., use "Read the Accessible Email Guide" instead of "Click Here").
Avoid Tables for Layout: Tables should be avoided when you want to simply format other content (i.e., just to line things up neatly.)
Alt Text for Images: Always add descriptive alternative text for any images so screen readers can describe the visuals. Avoid sending "image-only" attachments, as they are unreadable to assistive software.
Send Email Within Brightspace
Email sent within Brightspace is sent using the Email tool. Within the Brightspace Email tool, you will use the Brightspace Editor to compose the body of your email. The Brightspace Editor has a built-in accessibility checker that makes it easy to check for issues or offer suggestions to fix identified accessibility issues.
Email with the Brightspace Editor's Accessibility Checker icon highlighted.The Brightspace Editor's Accessibility Checker icon is highlighted in this Intelligent Agent's email message with a pop up window showing no accessibility issues detected.
You will remove significant barriers for users of assistive technology if you take these suggestions into consideration when creating email. An added bonus is that if you create your emails with accessibility in mind you will be ahead of the game in the event you do have a student who requires the use of assistive technology.
Thursday, May 21st, is Global Accessibility Awareness Day (GAAD). GAAD aims to get you talking, thinking, and learning about digital access/inclusion and people with different abilities and talents.
Accessibility is about everyone. It is extremely important for students with disabilities to have access to accessible course content.
The Brightspace Editor has a built-in accessibility checker that makes it easy to check for issues or offer suggestions to fix identified accessibility issues.
Follow these steps to do it.
To check for accessibility issues:
After you add content to the Brightspace Editor, click the accessibility checker icon.
The checker indicates if the content is free of accessibility issues, or offers suggestions to fix them.
Note: Are you doing something innovative in Brightspace or perhaps you've discovered a handy tip? Share how you are using Brightspace in your teaching and learning in The Orange Room.
Thursday, May 21st, is Global Accessibility Awareness Day (GAAD). The purpose of GAAD is to get everyone talking, thinking and learning about digital (web, software, mobile, etc.) access/inclusion and people with different disabilities.
While people may be interested in the topic of making technology accessible and usable by persons with disabilities, the reality is that they often do not know how or where to start. Awareness comes first.
The key to embracing accessibility – whether online, in the classroom, or on campus is realizing that taking the time to address an issue doesn’t just help a handful of individuals; in the end, everyone benefits.
Participants in global accessibility awareness day are encouraged to attempt to go an hour without using a technology most people take for granted – such as not using a computer mouse, attempting to navigate a website using a screen reader, or enlarging all of the fonts in a web browser to 200 percent, to see how functionality may be lost when accessibility isn’t taken into consideration in the design.
A new feature of Respondus LockDown Browser / Respondus Monitor is the ability to record the learner from different angles. This feature is aimed at increasing exam integrity by allowing instructors to view a student's workspace, keyboard, and screen, reducing unpermitted resource use.
Respondus Monitor now supports a second camera, providing an additional video angle during exams. This added visibility is designed to deter the use of unapproved resources and give instructors greater control over exam security.
This feature allows the use of two cameras for exams using Respondus Monitor: the primary webcam plus a camera from a mobile device (phone, tablet). The second device must be able to scan a QR code. When this setting is enabled by the instructor, the learner will be prompted to set up a second camera.
Post-Exam Review
Once the exam is submitted, the instructor can view up to three videos synchronously with the proctoring results: frontal webcam, second camera, and screen recording.
Key Requirements for Students
Mobile Device: Students must have a smartphone or tablet with a working camera.
Connection: Students will need to scan a QR code displayed on their computer screen during the startup sequence to sync the camera on their mobile device (i.e., the second camera).
App/Browser: Students do not need a separate app; when they scan the QR code with their mobile device, it opens a secure web-based recorder in their mobile browser (Safari on iOS 18+ or Chrome on Android).
Note: Are you doing something innovative in Brightspace or perhaps you've discovered a handy tip? Share how you are using Brightspace in your teaching and learning in The Orange Room.
Brightspace, our Learning Management System (LMS), is designed with accessibility in mind. However, it is the responsibility of the instructor and/or course designer to ensure their course content is formatted using best practices for accessibility; including the use of good heading structure, text formatting, contrast and color, descriptive links, alternative text, tables, lists, etc.
I am writing a series of accessibility related blog posts that will provide suggestions on how you can make small changes when creating course content to make it accessible. This is the seventh tip in my series of accessibility related blog posts and it focuses on tables.
A table is a means of arranging information into rows and columns. Tables are very useful for displaying data in an organized manner. Your course schedule and office hours are examples where formatting this information in a table could make it more accessible.
Example of a Brightspace course page with an accessible table
Tables should be avoided when you want to simply format other content (i.e., just to line things up neatly.) Using tables just for layout purposes is not the best practice for accessibility and may make it nearly impossible for people who use assistive technologies to access the information. If you do choose to use a table to layout text on the page, make sure you lay it out so it will make sense when read from left to right. Text-to-speech software by default will read the information in a table left to right, cell by cell, and row by row.
This video shows how a screen reader reads information in tables. There is an example of a good and a bad table layout. The video demonstrates how reading order AND the information in the columns are important considerations when creating accessible tables.
In the bad example in the video, the use of the dash and abbreviations for the months can be confusing when read by a screen reader. The abbreviated months would have been less confusing if the year had been included. The use of 1,2,3 in the "Week" column in the bad example can be confusing as well. A better option is to use Week 1, Week 2, Week 3 in the respective column.
When creating tables, read your table left to right, top to bottom (never repeating a cell). Does it make sense? Keep in mind that a screen reader will read tables in this way. If it doesn't make sense, you should reorganize the table so that it makes sense when read left to right, top to bottom without repeating a cell.
Consider these examples of accessible tables:
The tables, in the examples above, make sense when read left to right, top to bottom, without repeating a cell.
Follow these tips when creating tables to make them accessible:
Do not use tabs or spaces to create tables. It may look like a table; however it will not be recognized as a table and can be confusing when read by assistive technologies.
Add Row and Column Headers to tables to distinguish the heading text from the data area of the table. Screen readers read simple tables efficiently when the column or row headers are clearly defined.
Repeat Row Headers if the table spans more than one page. Tables that are contained on multiple pages should have the header row repeated on each page.
When you use tables for the presentation of data, summarize the table to aid reader comprehension. This helps all students to know the high points of a table.
Break up complex tables (nested tables and merged or split cells inside of tables) into a series of simple tables. Simple tables are more usable for everyone.
The information in each cell should make sense if read without the column heading. For example, instead of entering 1, 2, 3, in a "Chapter" column you should enter Chapter 1, Chapter 2, Chapter 3, in the cells to make it clearer when read by a screen reader.
When applying structure to documents and web content, you should use the appropriate built-in formatting structure tools to do so. Doing so will make content accessible to everyone, including users of assistive technology.
Creating tables in MS Word:
On the Insert tab choose Insert Table and select the appropriate number of rows and columns for your table.
Select the header row in the table and press the right mouse button. A Table Properties window will open.
Select the Row tab and check the box next to Repeat as header row at the top of each page. Press Enter key or Ok button. This header row will be repeated at top of each page.
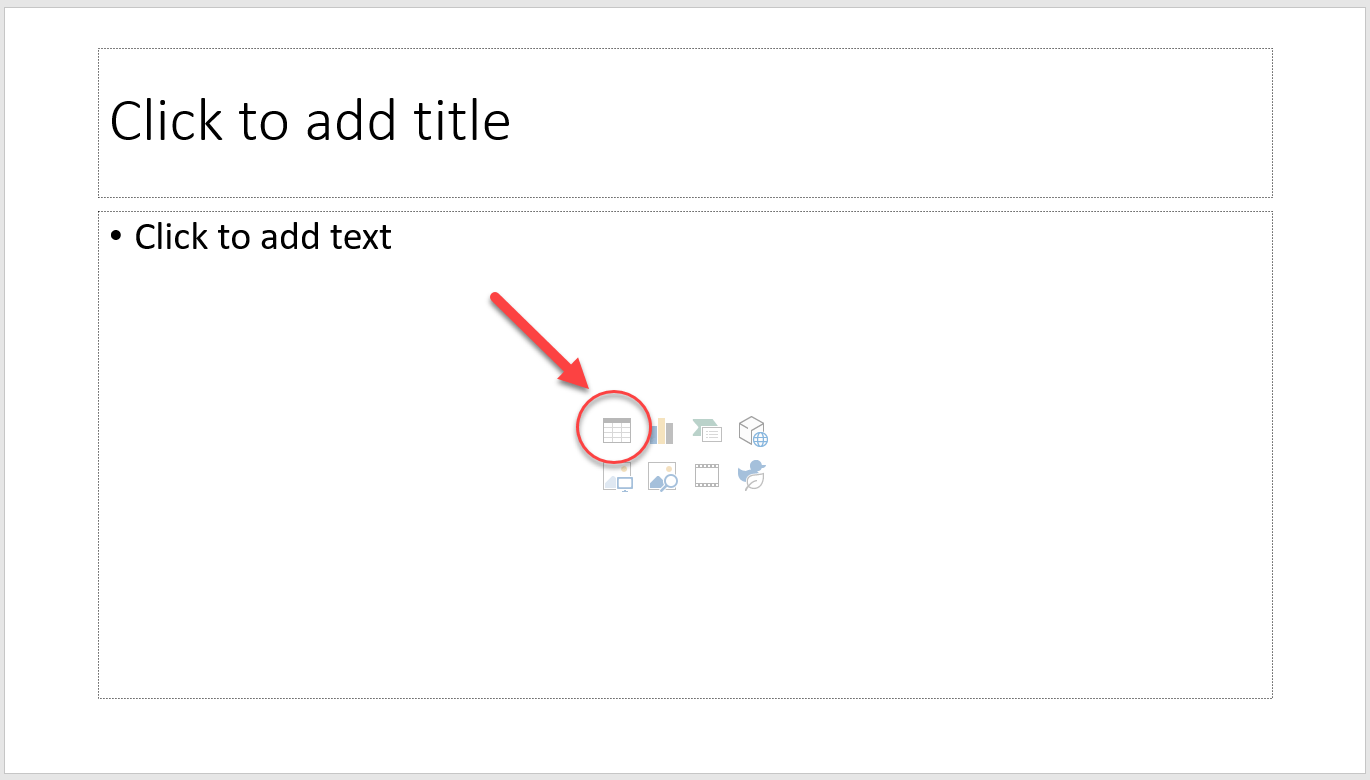
Creating tables in PowerPoint:
Use the Insert Table function in the Slide layout, select the appropriate number of rows and columns for your table.
Alternatively you can insert a table:
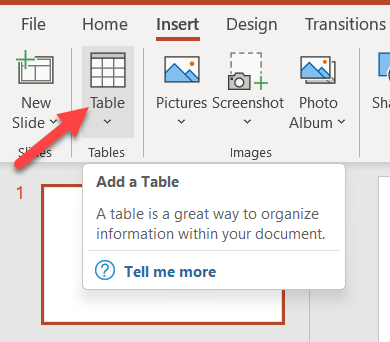
From the Insert tab, click the Table command.
A drop-down menu containing a grid of squares will appear. Hover the mouse over the grid to select the number of columns and rows in the table.
Place your cursor in the text area where you would like to insert the table.
Click the insert/edit table function and select the appropriate number of rows and columns for your table to begin adding a table in the text area.
To create column headers:
Highlight the entire row that you want to mark up as a table header. Alternatively you can put your cursor in one of the cells you want to mark up as a table header.
Then click on the drop-down menu next to the Table icon in the toolbar.
Choose Cell and then Cell Properties. The Cell properties window will pop-up.
In the Cell type field, click on the drop-down list and select Header cell.
Click Save. You will know you have successfully changed the row to table headers because the look of the table cells will change.
Repeat for each cell that is a column header.
You will remove significant barriers for users of assistive technology if you take these suggestions into consideration when creating course content. An added bonus is that if you include properly structured tables when creating your course content you will be ahead of the game in the event you do have a student who requires the use of assistive technology. Remember a properly structured table is good design and can benefit everyone.
Brightspace, our Learning Management System (LMS), is designed with accessibility in mind. However, it is the responsibility of the instructor and/or course designer to ensure their course content is formatted using best practices for accessibility; including the use of good heading structure, text formatting, contrast and color, descriptive links, alternative text, tables, lists, etc.
I am writing a series of accessibility related blog posts that will provide suggestions on how you can make small changes when creating course content to make it accessible. This is the sixth tip in my series of accessibility related blog posts and it focuses on lists.
A list is a set of items that share a purpose and/or have common characteristics. Lists are great from an accessibility standpoint because they provide structured order to content in a linear fashion.
Properly structured lists help to identify order and hierarchy in documents and web content. Lists that are properly formatted allow all users, especially those using assistive technology, to identify and navigate through a related group of items. List items that are not properly formed or grouped may not be translated properly by assistive technology.
Bulleted (unordered) lists should be used when there is no order of sequence or importance. Numbered (ordered) lists suggest a progression or sequence.
Example of a Brightspace course page with a bulleted (unordered) listExample of a Brightspace course page with a numbered (ordered) list
Compound lists contain multiple levels of classification. For example, a compound home improvement list would have items organized by category (e.g. electrical, hardware, flooring, plumbing.) With compound lists, relationships are shown visually using indents and different item markers (i.e., bullets, numbers, letters, etc.).
Compound lists may be difficult for visual users to decipher if the visual cues are insufficient. Also, compound lists may be disorienting for nonvisual users. Use a simple list structure whenever possible.
As with headings, lists should be used correctly and for the right purposes. Lists should never be used for merely indenting or other layout purposes.
When lists are formatted using asterisks, hyphens or images to create the look of bullets in a document, users of assistive technology are not able to detect the hierarchical structure and relationship of the list items. You should never rely on indentation to provide a visual list, use the proper structure instead.
Lists should be created using the built-in tools for ordered (numbered) and unordered (bulleted) lists. Without using these tools, a list is not really a list, which makes the content more difficult for assistive technology users to fully understand.
Creating lists in MS Word and PowerPoint:
Select the text that you want to add bullets or numbering to.
On the Home tab, under Paragraph, select the appropriate bullet from the list.
Creating lists in Google Docs and Slides:
On your computer, open a document or presentation in Google Docs or Slides
Click a page or slide where you want to add a list
In the toolbar, choose a list type. If you don't see the option, click More ...
Start typing your text for the list
Creating lists in the Brightspace Editor:
In the Brightspace Editor, select the text that you want to add bullets or numbering to
Select the Bulleted List or Numbered List button
You will remove significant barriers for users of assistive technology if you take these suggestions into consideration when creating course content. An added bonus is that if you include properly structured lists when creating your course content you will be ahead of the game in the event you do have a student who requires the use of assistive technology.
As you prepare to teach this summer, now is a good time to get started setting up your Brightspace courses. Our Information Technology Center (ITC) has created the summer courses in Brightspace.
NOTE: You should see your summer courses in the My Courses widget. If you do not see your summer courses in your My Courses widget, you should click on the link to "View All Courses" (located at the bottom of the My Courses widget). Verify that you are listed as the instructor for the course in Banner. You can find more information about the updated My Courses Widget sort logic at this link.
To get started, you can post your syllabus, course documents, announcements, and set up your Grade Book in your Brightspace courses. You can also customize your course homepage and/or course image/banner.
If you teach a course that is cross listed you will have a Brightspace course for each cross listing. You can combine the cross listed courses into one Brightspace course so that you can post course materials and grades to one combined Brightspace course. Combining courses may also work for you if you are teaching different sections of the same course and would like to have the different sections combined into one Brightspace course so that you can post course documents and grades in the one combined course. The beginning of the semester is the best time to submit a request to merge your Brightspace courses before you add course materials or grades to the courses.
Additionally, if the summer course you are teaching is the same as one of your previous courses you can copy the entire course (or copy components) into your "empty" Brightspace summer course.
About Inactive Courses:
When ITC creates the Brightspace courses, they are set to inactive by default. Instructors have access to inactive courses but students who are enrolled in an inactive course do not have access to it. Faculty have no control over the active/inactive status of courses. Brightspace will not send alerts or notifications from inactive courses.
ITC will make courses active after the first deregistration (dereg) of students who are not fiscally cleared. At that point students will be able to access their courses. The dereg process usually occurs after registration. The registrar informs ITC of when the dereg process is complete.
NOTE: Even though a course is inactive, instructors can still email students. This can be done in several different ways. Instructors can send email within the course (even though it is inactive); the email will go out to the students. Instructors can send email to their students in Banner, and can also email the students through EAB.
Note: Are you doing something innovative in Brightspace or perhaps you've discovered a handy tip? Share how you are using Brightspace in your teaching and learning in The Orange Room.
A few weeks after the end of the semester, all Spring 2026 courses will be changed to an inactive status. Once the courses are changed to an inactive status, student work and grades will be visible to the instructor but students will no longer have access to the course.
The current policy is that courses will remain on the Brightspace system for three semesters before they are removed. You can request a Brightspace Master Course Shell that you can use to make a copy of your course. Master Course Shells will not be removed from the Brightspace system. If you would like your course content/materials to be available in Brightspace beyond the current retention period of three semesters, you should request a Master Course Shell for the course.
A Master Course Shell:
Is a course environment an instructor uses to develop and maintain course materials that are used from semester to semester.
Is not tied to Banner. Therefore, no students or other users are enrolled into this Shell.
Can be used as a "master" where one keeps permanent changes to a course.
Faculty may copy content from a Master Course Shell into a Brightspace Course shell as long as they are enrolled as an instructor in both shells.
Master Course Shells are not deleted except upon the request of the instructor or when the instructor is no longer employed at Xavier.
A Time-Saving Tool for Instructors
Master Course Shells can be a timesaving tool for instructors. Using a Master Course Shell gives instructors time to build their courses the way they want, when they want, and update it as needed. Think of a Master Course Shell as a template course instructors can build once and use repeatedly. Here's how instructors typically use Master Course Shells:
Build Master Course: Develop a course (e.g., lectures, assignments, instructional materials, assessments) in the Master Shell. This becomes your baseline course structure.
Copy to Current Course: When ITC has created your course for the new semester, copy the Master Course Shell contents into your new empty course that ITC created.
Adapt for the Semester (Optional): Instructors can customize the copied course content to fit their needs for the current semester. This might involve adding new material, removing outdated content, or adjusting deadlines.
Keeping the Master Course Shell Up-to-Date: If you make significant changes to the active course during the semester, the Master Course Shell becomes outdated. To update the Master Course Shell with these changes, you can request a Course Reset for your Master Course Shell. A course reset permanently deletes course content, activities, and associated files. After the reset, you would copy the contents from the active course into your Master Course Shell. So, now your Master Course Shell has the latest course materials and information.
NOTE: To request a course reset for a Master Course Shell, send an email to jflorent@xula.edu and include the exact name of the Master Course Shell that you would like reset.
Note: Are you doing something innovative in Brightspace or perhaps you've discovered a handy tip? Share how you are using Brightspace in your teaching and learning in The Orange Room.
As we approach the end of the semester there are a few things you can do in Brightspace to wrap up for the semester.
Release final course grades
Unlike other grade items and categories in the Grade Book, final grades are not available to students by default. Final grades must be released. If you did not choose to enable the automatic release of final grades when setting up your Grade Book, you will have to manually release final grades in order for students to see their final grade.
Export your Grade Book
Student access to courses is removed two weeks after the end of a semester. This process of making the courses inactive allows student work and grades to be visible to instructors but students no longer have access to the course. Courses will remain on the Brightspace system for three semesters before they are removed. You should export (download) your Grade Book to your Microsoft OneDrive after you submit your final grades.
NOTE: The export file that is created will NOT contain any student work or instructor feedback. Only the grades in your Grade Book will be exported.
Create a master copy of your course
Courses remain on the Brightspace system for three semesters before they are removed. You can request a Master Course Shell that you can use to develop and maintain your course materials. Master Course Shells will not be removed from the Brightspace system.
Note: Are you doing something innovative in Brightspace or perhaps you've discovered a handy tip? Share how you are using Brightspace in your teaching and learning in The Orange Room.
D2L (the company that owns Brightspace) uses Continuous Delivery to update our Brightspace system. The Continuous Delivery model gives us regular monthly updates allowing for incremental and easily integrated changes with no downtime required for our Brightspace system.
Our Continuous Delivery update occurs on the 4th Thursday of each month. D2L provides release notes to help users stay up-to-date with the changes.
This update from the April 2026/20.26.04 release was added to our system:
1) Quizzes – Improvements to the Quizzes evaluation
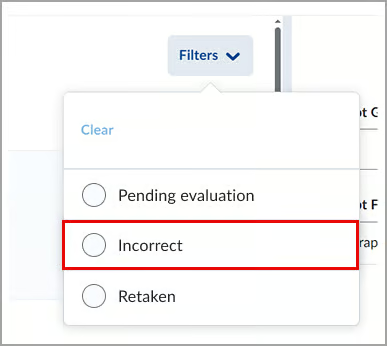
The quiz evaluation experience now includes an Incorrect filter that lets instructors quickly view quickly view answers marked incorrect. In addition, feedback fields automatically expand as needed, providing more space to review and enter feedback.
Instructors can now filter the quiz questions to review only the questions a learner answered incorrectly. This enhancement helps instructors identify trends and determine whether updates to questions or instructional materials are needed.
Previously, the available filters were Pending Evaluation and Retaken questions only. With this update, the new Incorrect filter displays only questions marked incorrect.
Filtering options for quiz answers after the update.
Additionally, feedback fields for questions are now displayed as a single line and automatically expand when instructors enter additional comments. Previously, the Feedback field for each question displayed several lines even when no feedback was entered, requiring users to scroll unnecessarily.
When evaluating a quiz question, enter additional comments to your Feedback in an automatically expanding field.
This feature implements the following PIE items:
D1865 (Filter for Viewing only Questions Missed)
D9123 (Quiz Filter to list only questions that were answered incorrectly)
D12922 (Quizzes: Filter when marking to only see questions answered incorrectly)
Note: Are you doing something innovative in Brightspace or perhaps you've discovered a handy tip? Share how you are using Brightspace in your teaching and learning in The Orange Room.


